In this tutorial we will learn how to manually create a backup & restore a website. To be able to manually do a backup for a specific website, you need to first expand the controls on the website
Backup
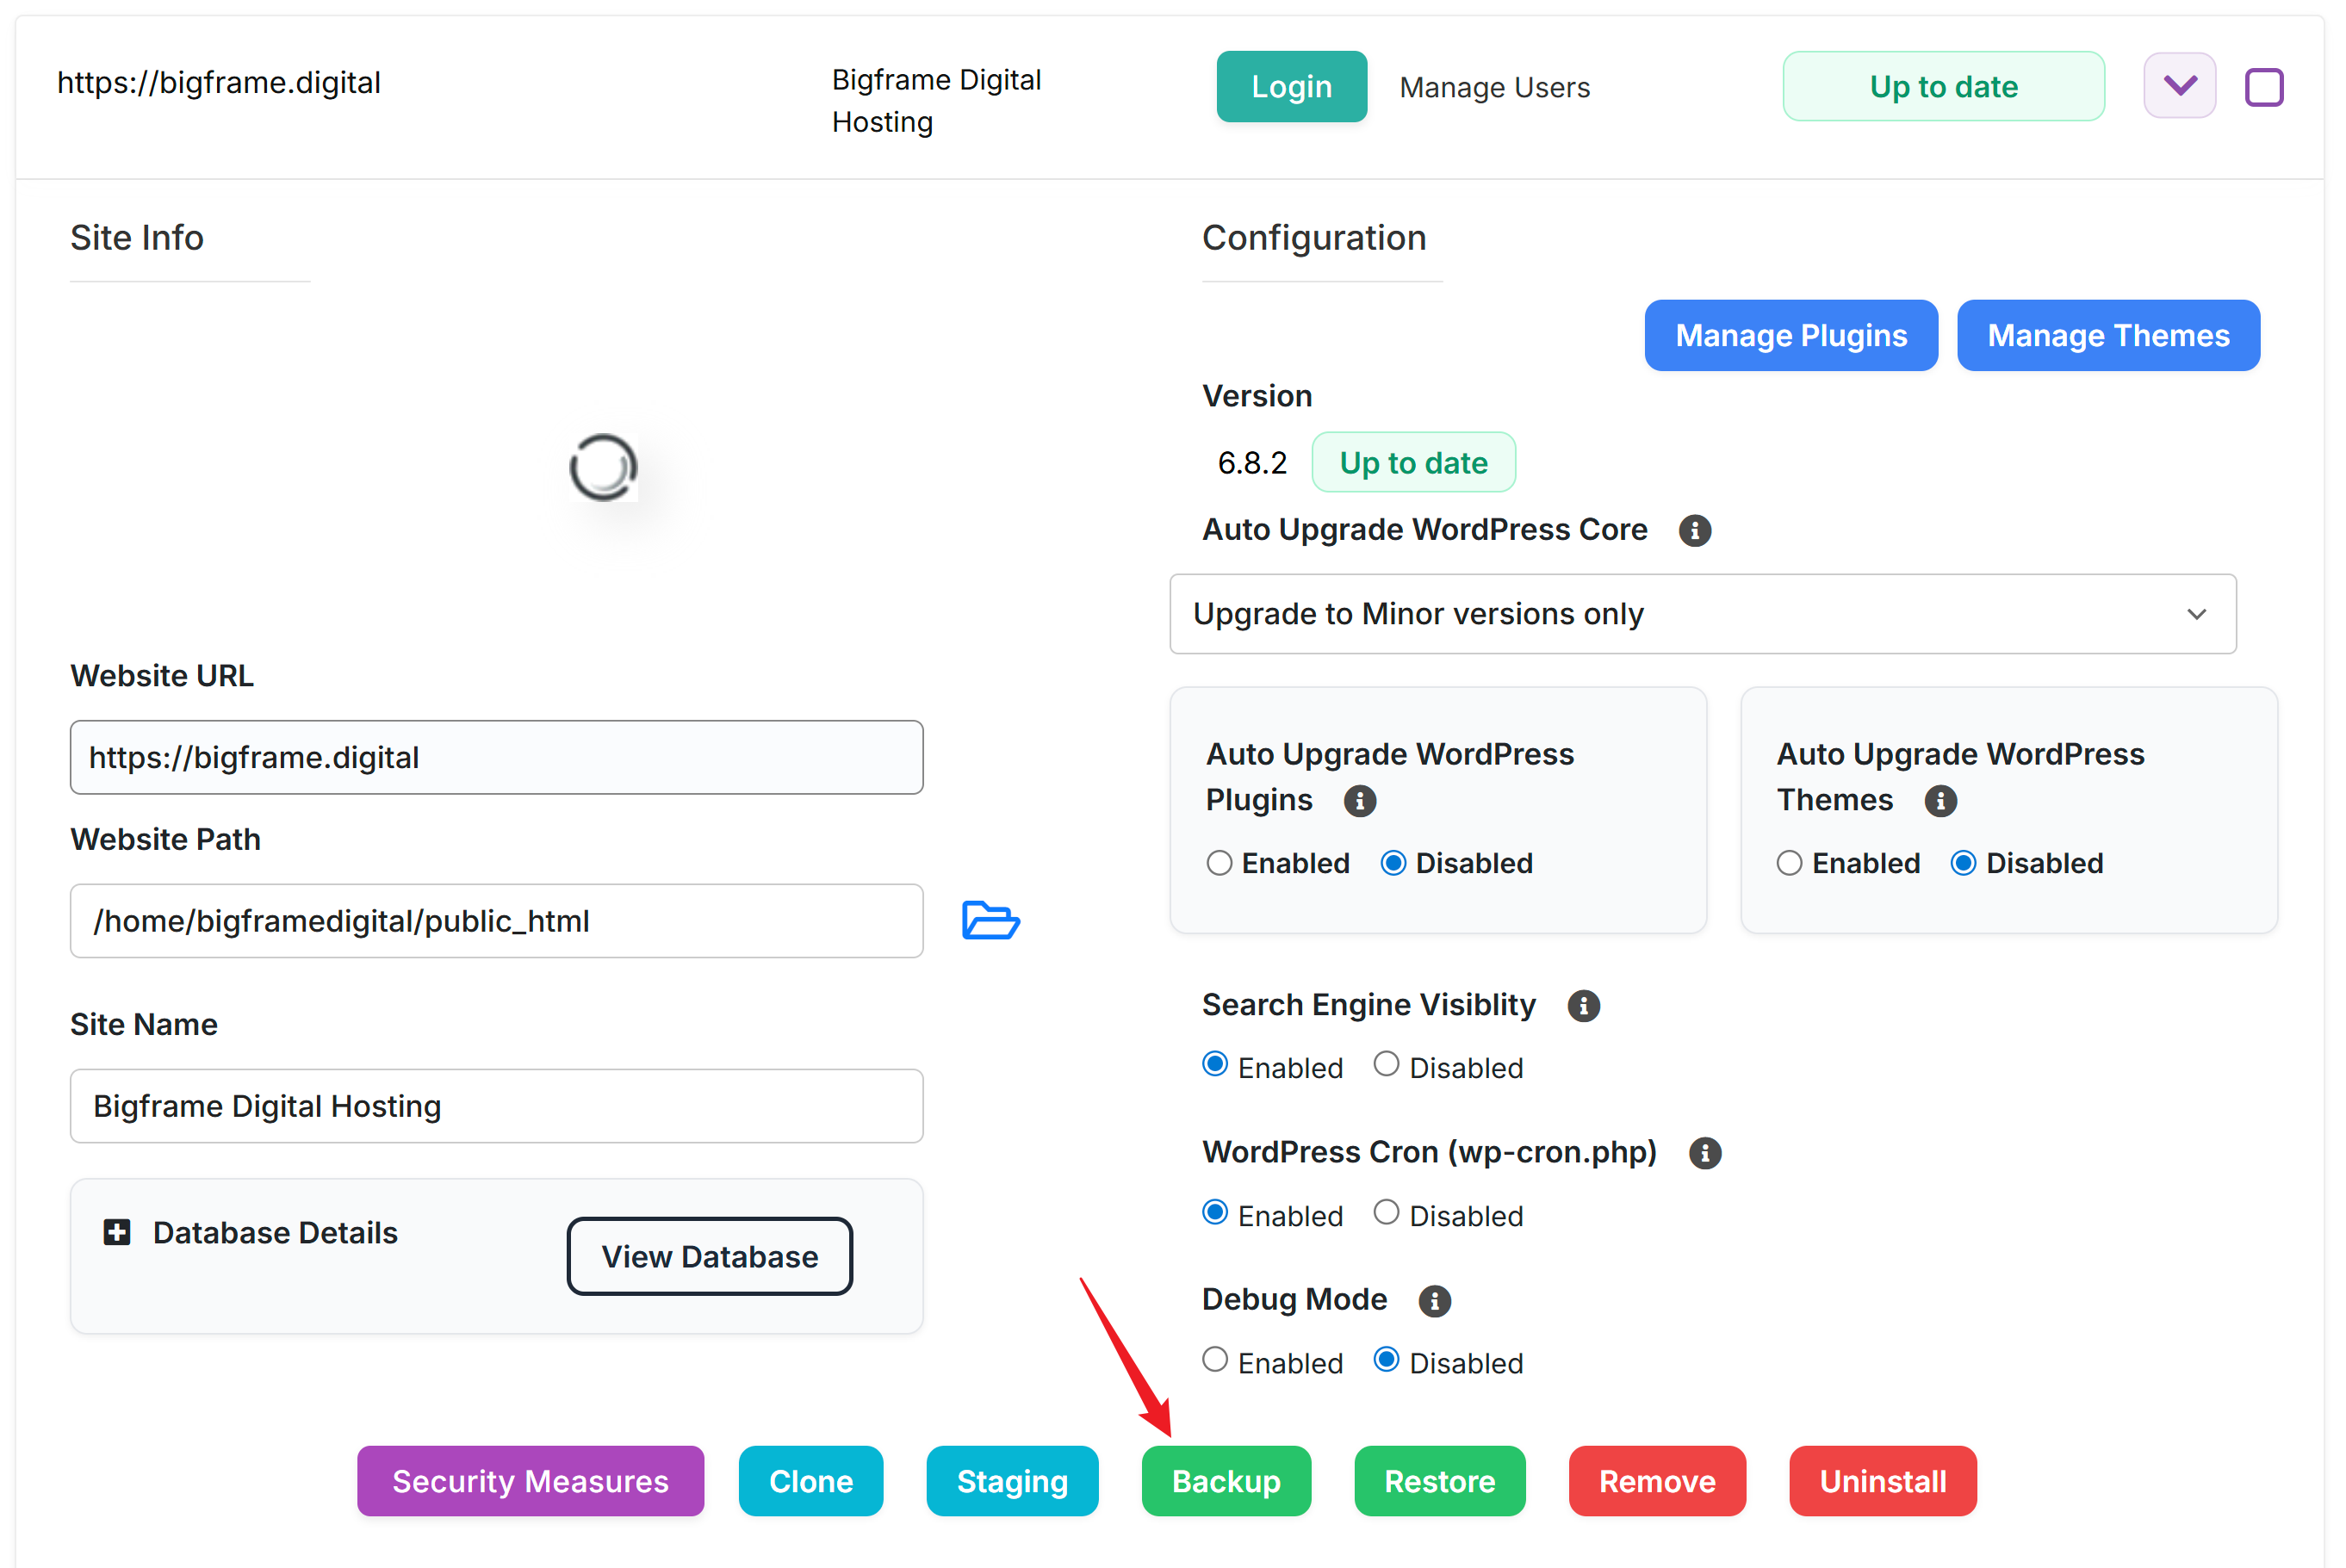
Once you expand the controls, click on the backup button, this will open the backup options.

You can learn how to change the backup location in our Google Drive backups tutorial on this very same section. Let's leave it at default for now. Our default location is a separate drive sitting locally on the same server and strictly dedicated to backups, so the operation should be really fast depending on the website size.
On the backup menu there is little you need to touch and most of the time you can simply click on Backup Installation and be done with it, but we recommend adding a "note" on the Backup Note which will come in handy if you need to restore the backup later. All the backup options should be enabled most of the time. Backup Directory will backup the files while the Backup Database will backup the database. Unticking any of those boxes will remove that option from the backup.
Once you hit that button you will see the backup window
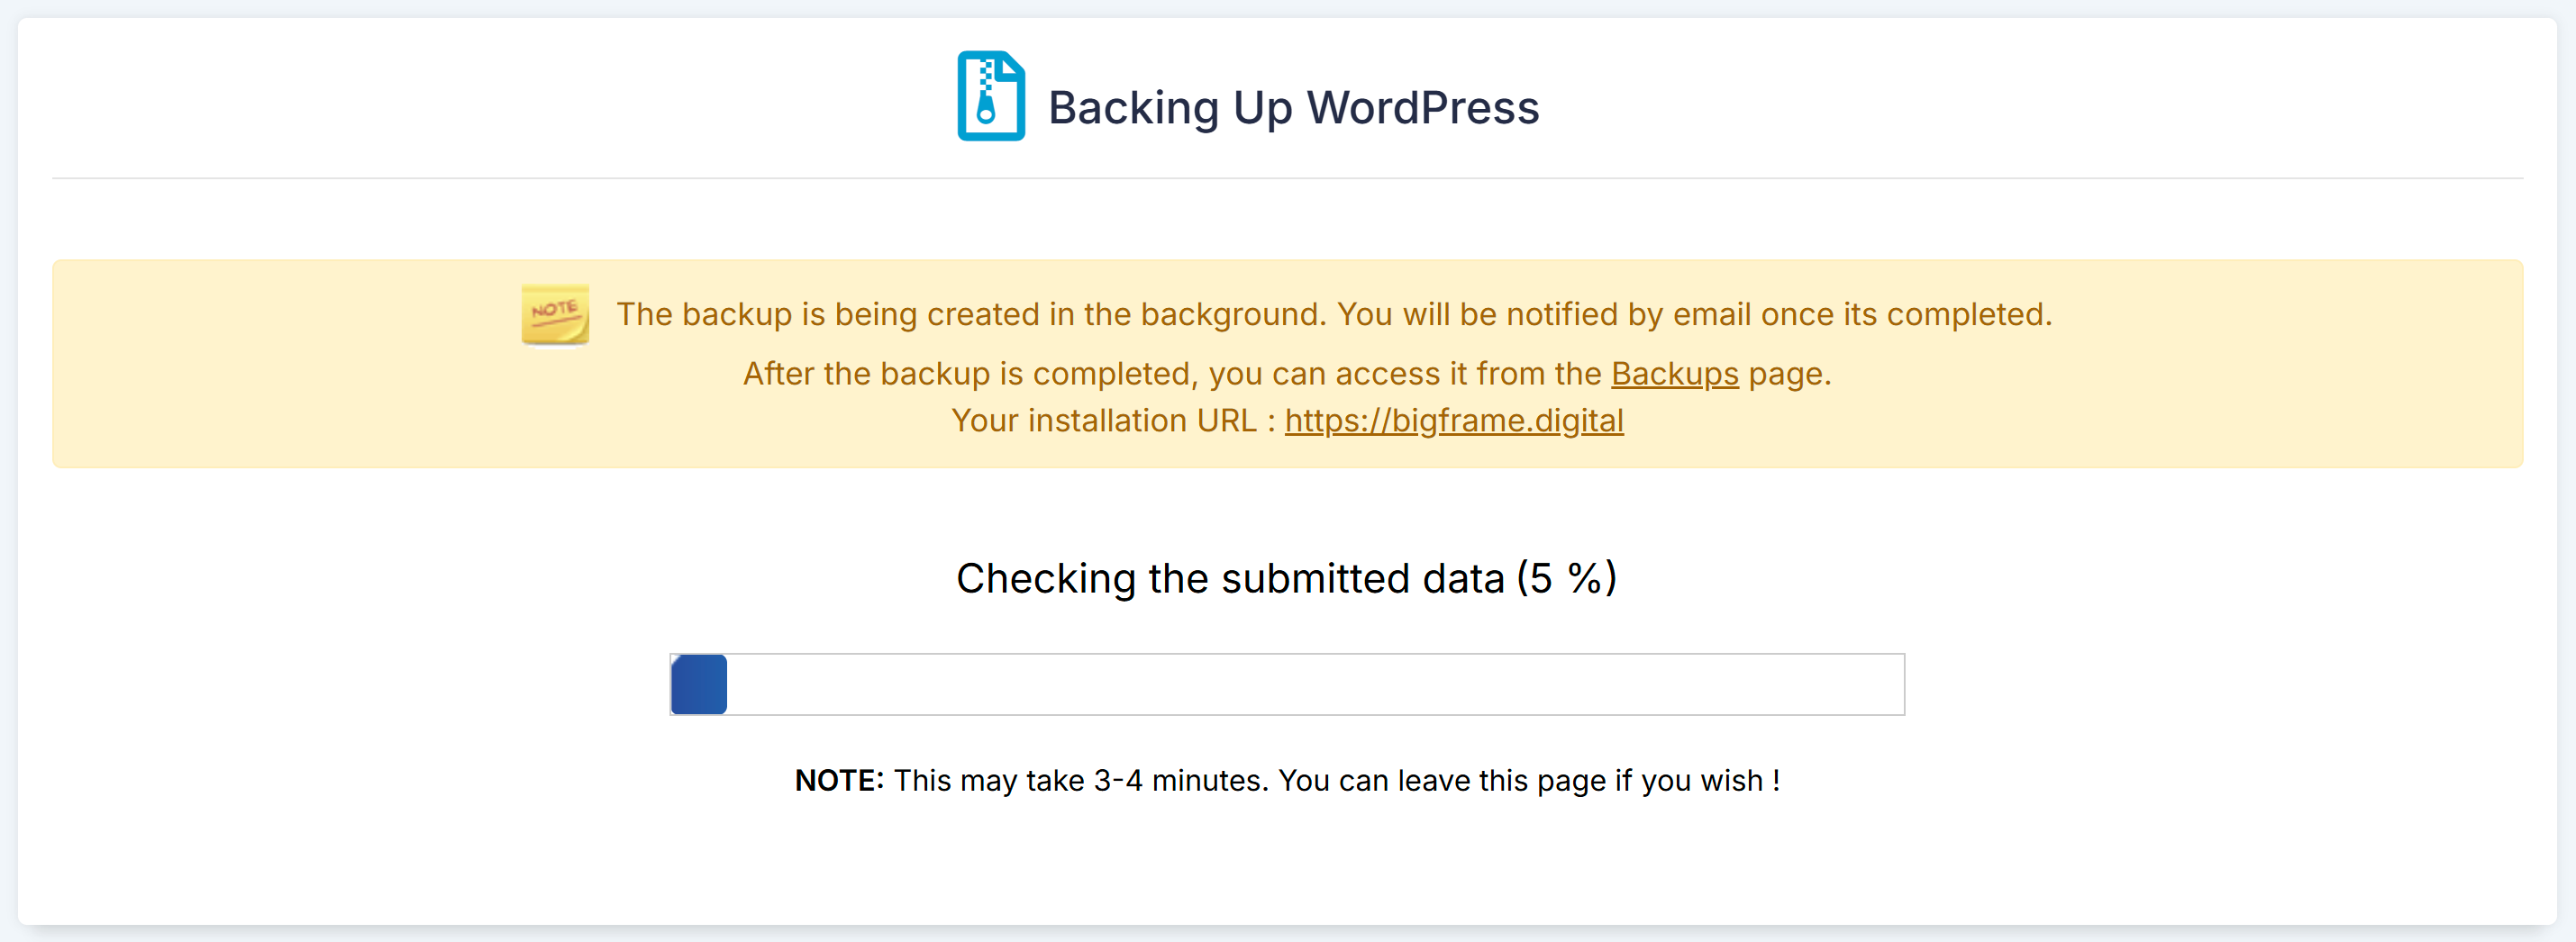
It is important to know that you are not forced to wait for the backup to complete. Once the backup started, it will run in the background and you can even close the window without any worries. The backup will be stored in the dedicated storage and will be accessible from the Restore button.
Restore
Now that we have a backup, we can update plugins/themes or work with the site. If we need to restore back to the previous point, we only need to press the restore button on the same website.
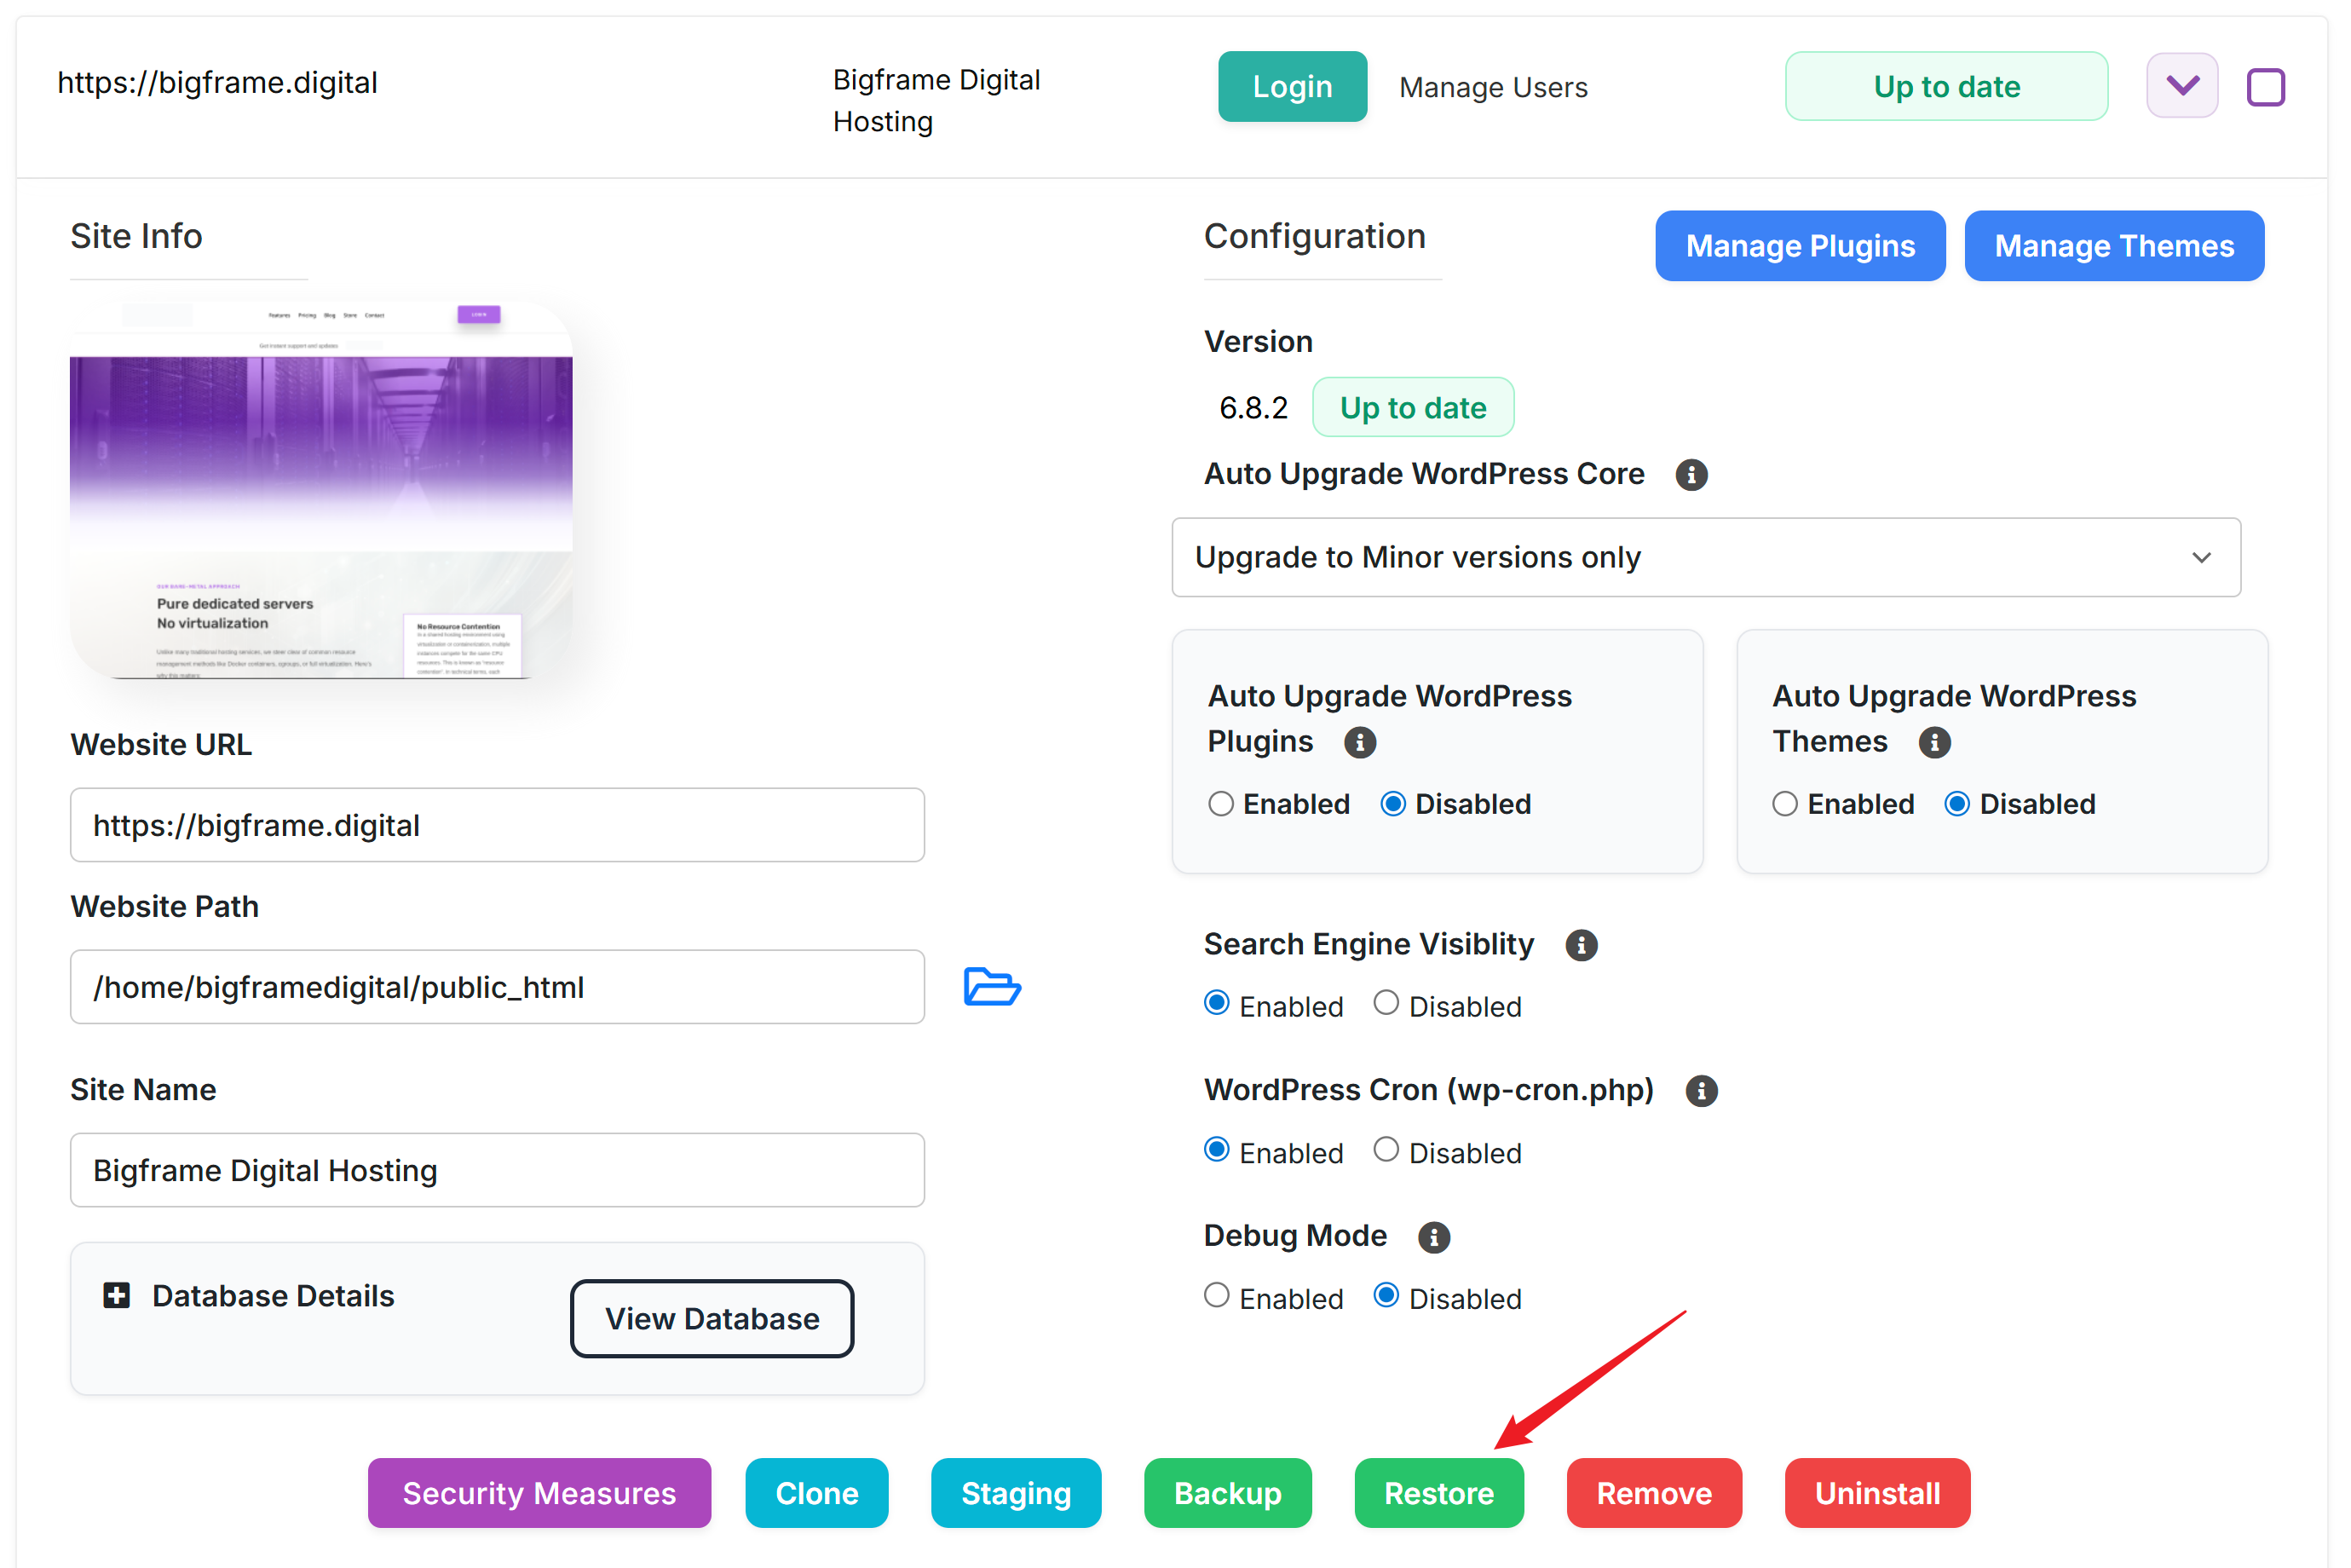
The restore button will simply redirect you to the Backup & Restore section, where you can see all the backups from all your websites and it looks like this. We have added an arrow to show you the exact location of this menu. You don't need to specifically press the Restore button on a website to access this section, you can go directly by following the top icon.
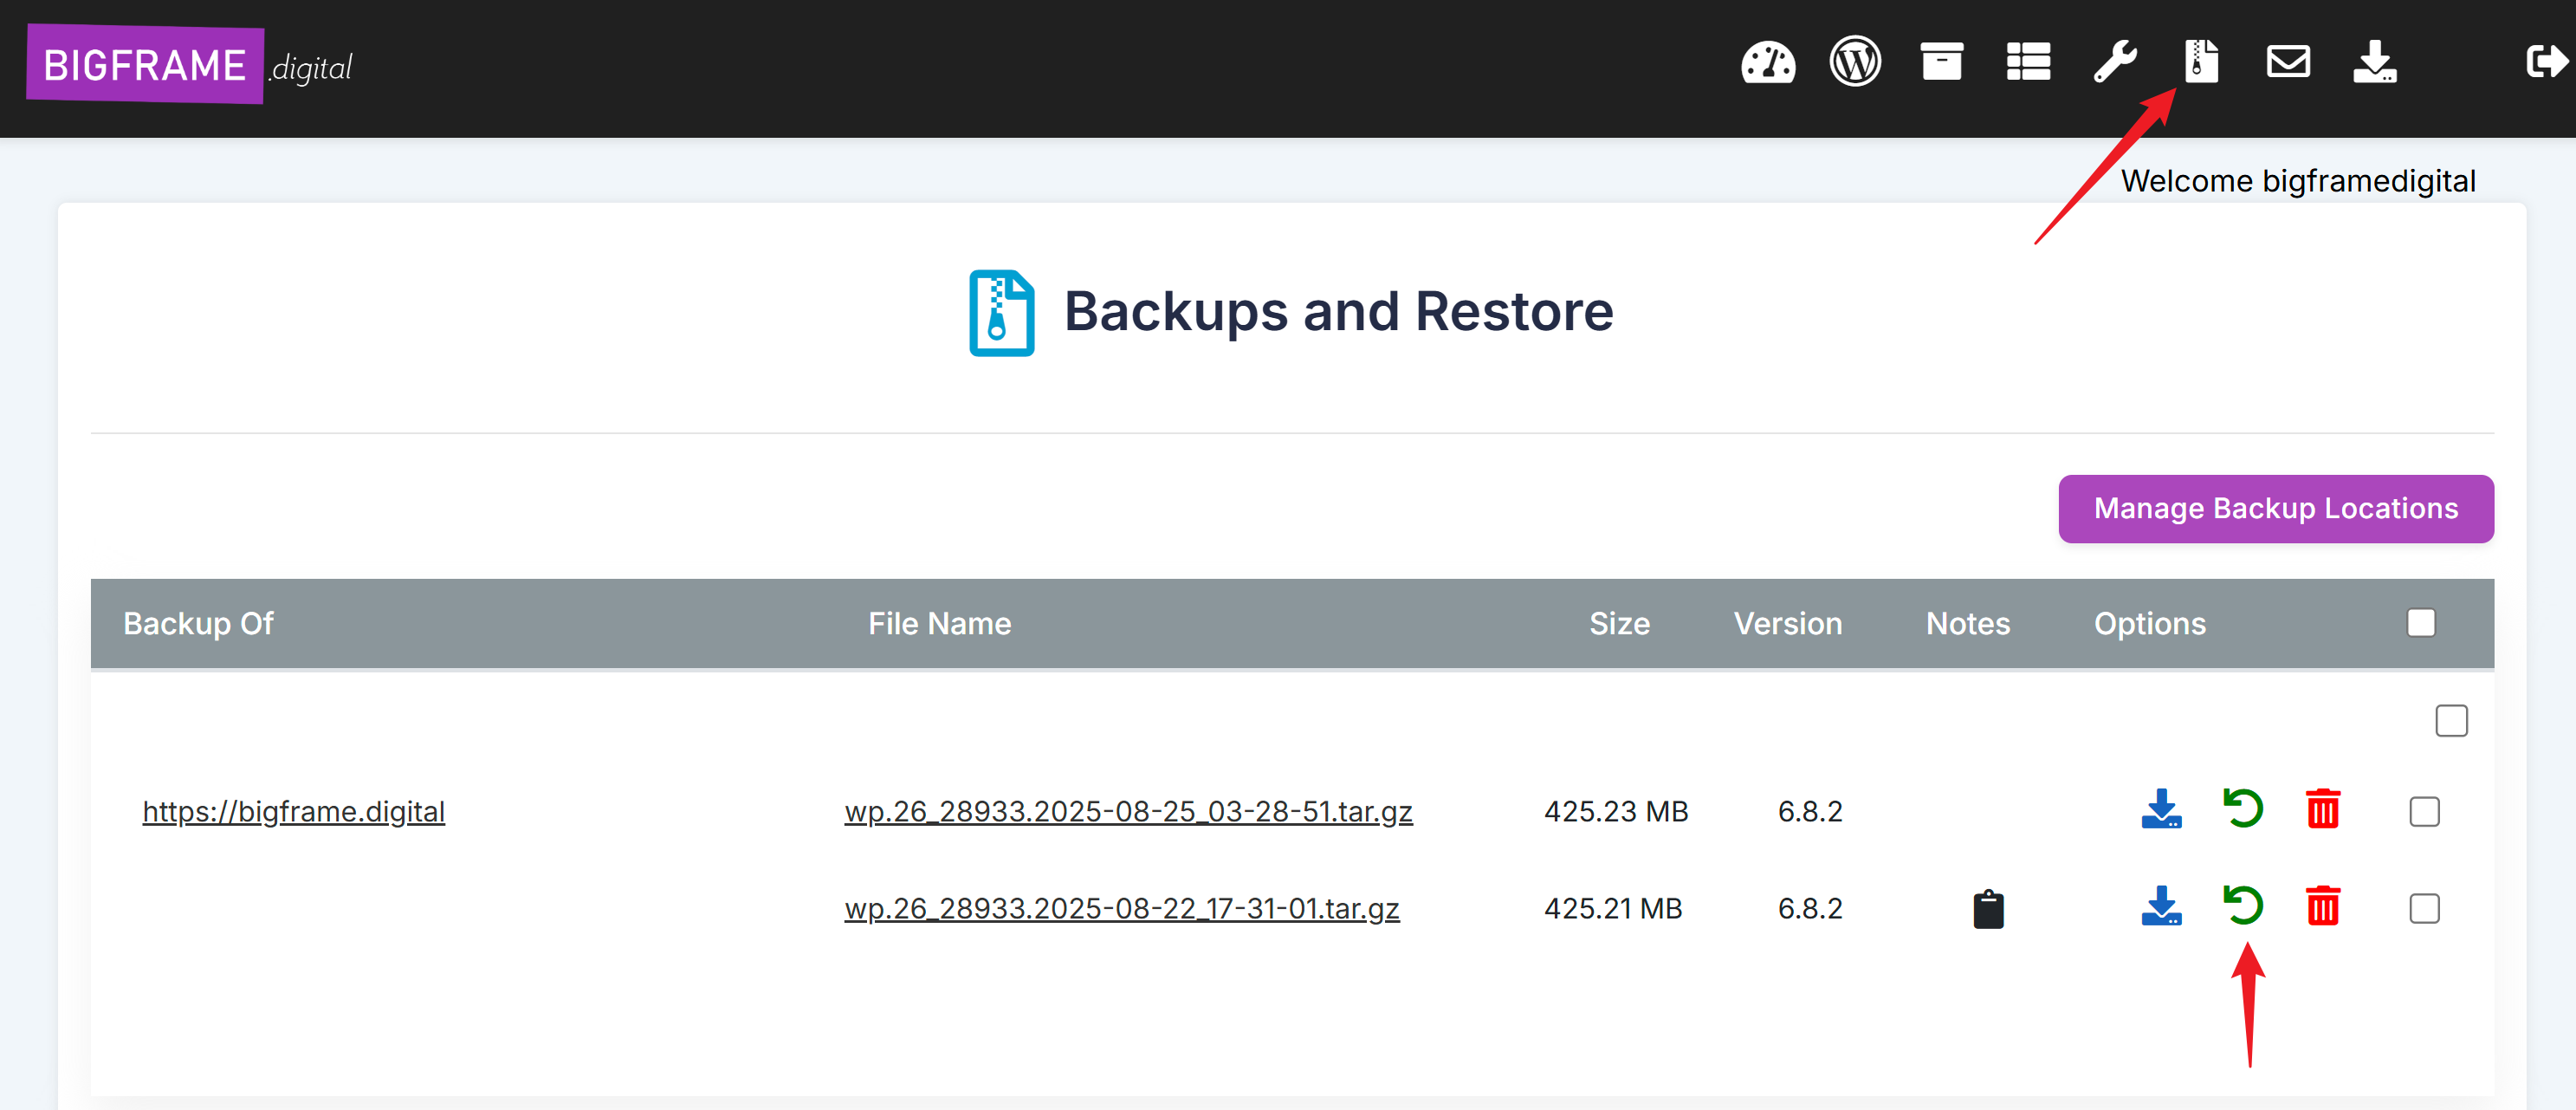
Once you are on the Backups and Restore section, you will see all the backups for all your websites. The backup files will include the timestampt in themselves after the website code number. The timestampt starts at the year, so if you see 2025-08-22-17-31-01 the exact date will be 2025-08-22-17-31-01
Usually, backups, similarly to domains, are ordered in the system by recent date, so the latest backups are always the ones on the bottom, for that particular website. If you want to restore a backup simply press the green icon for restore.
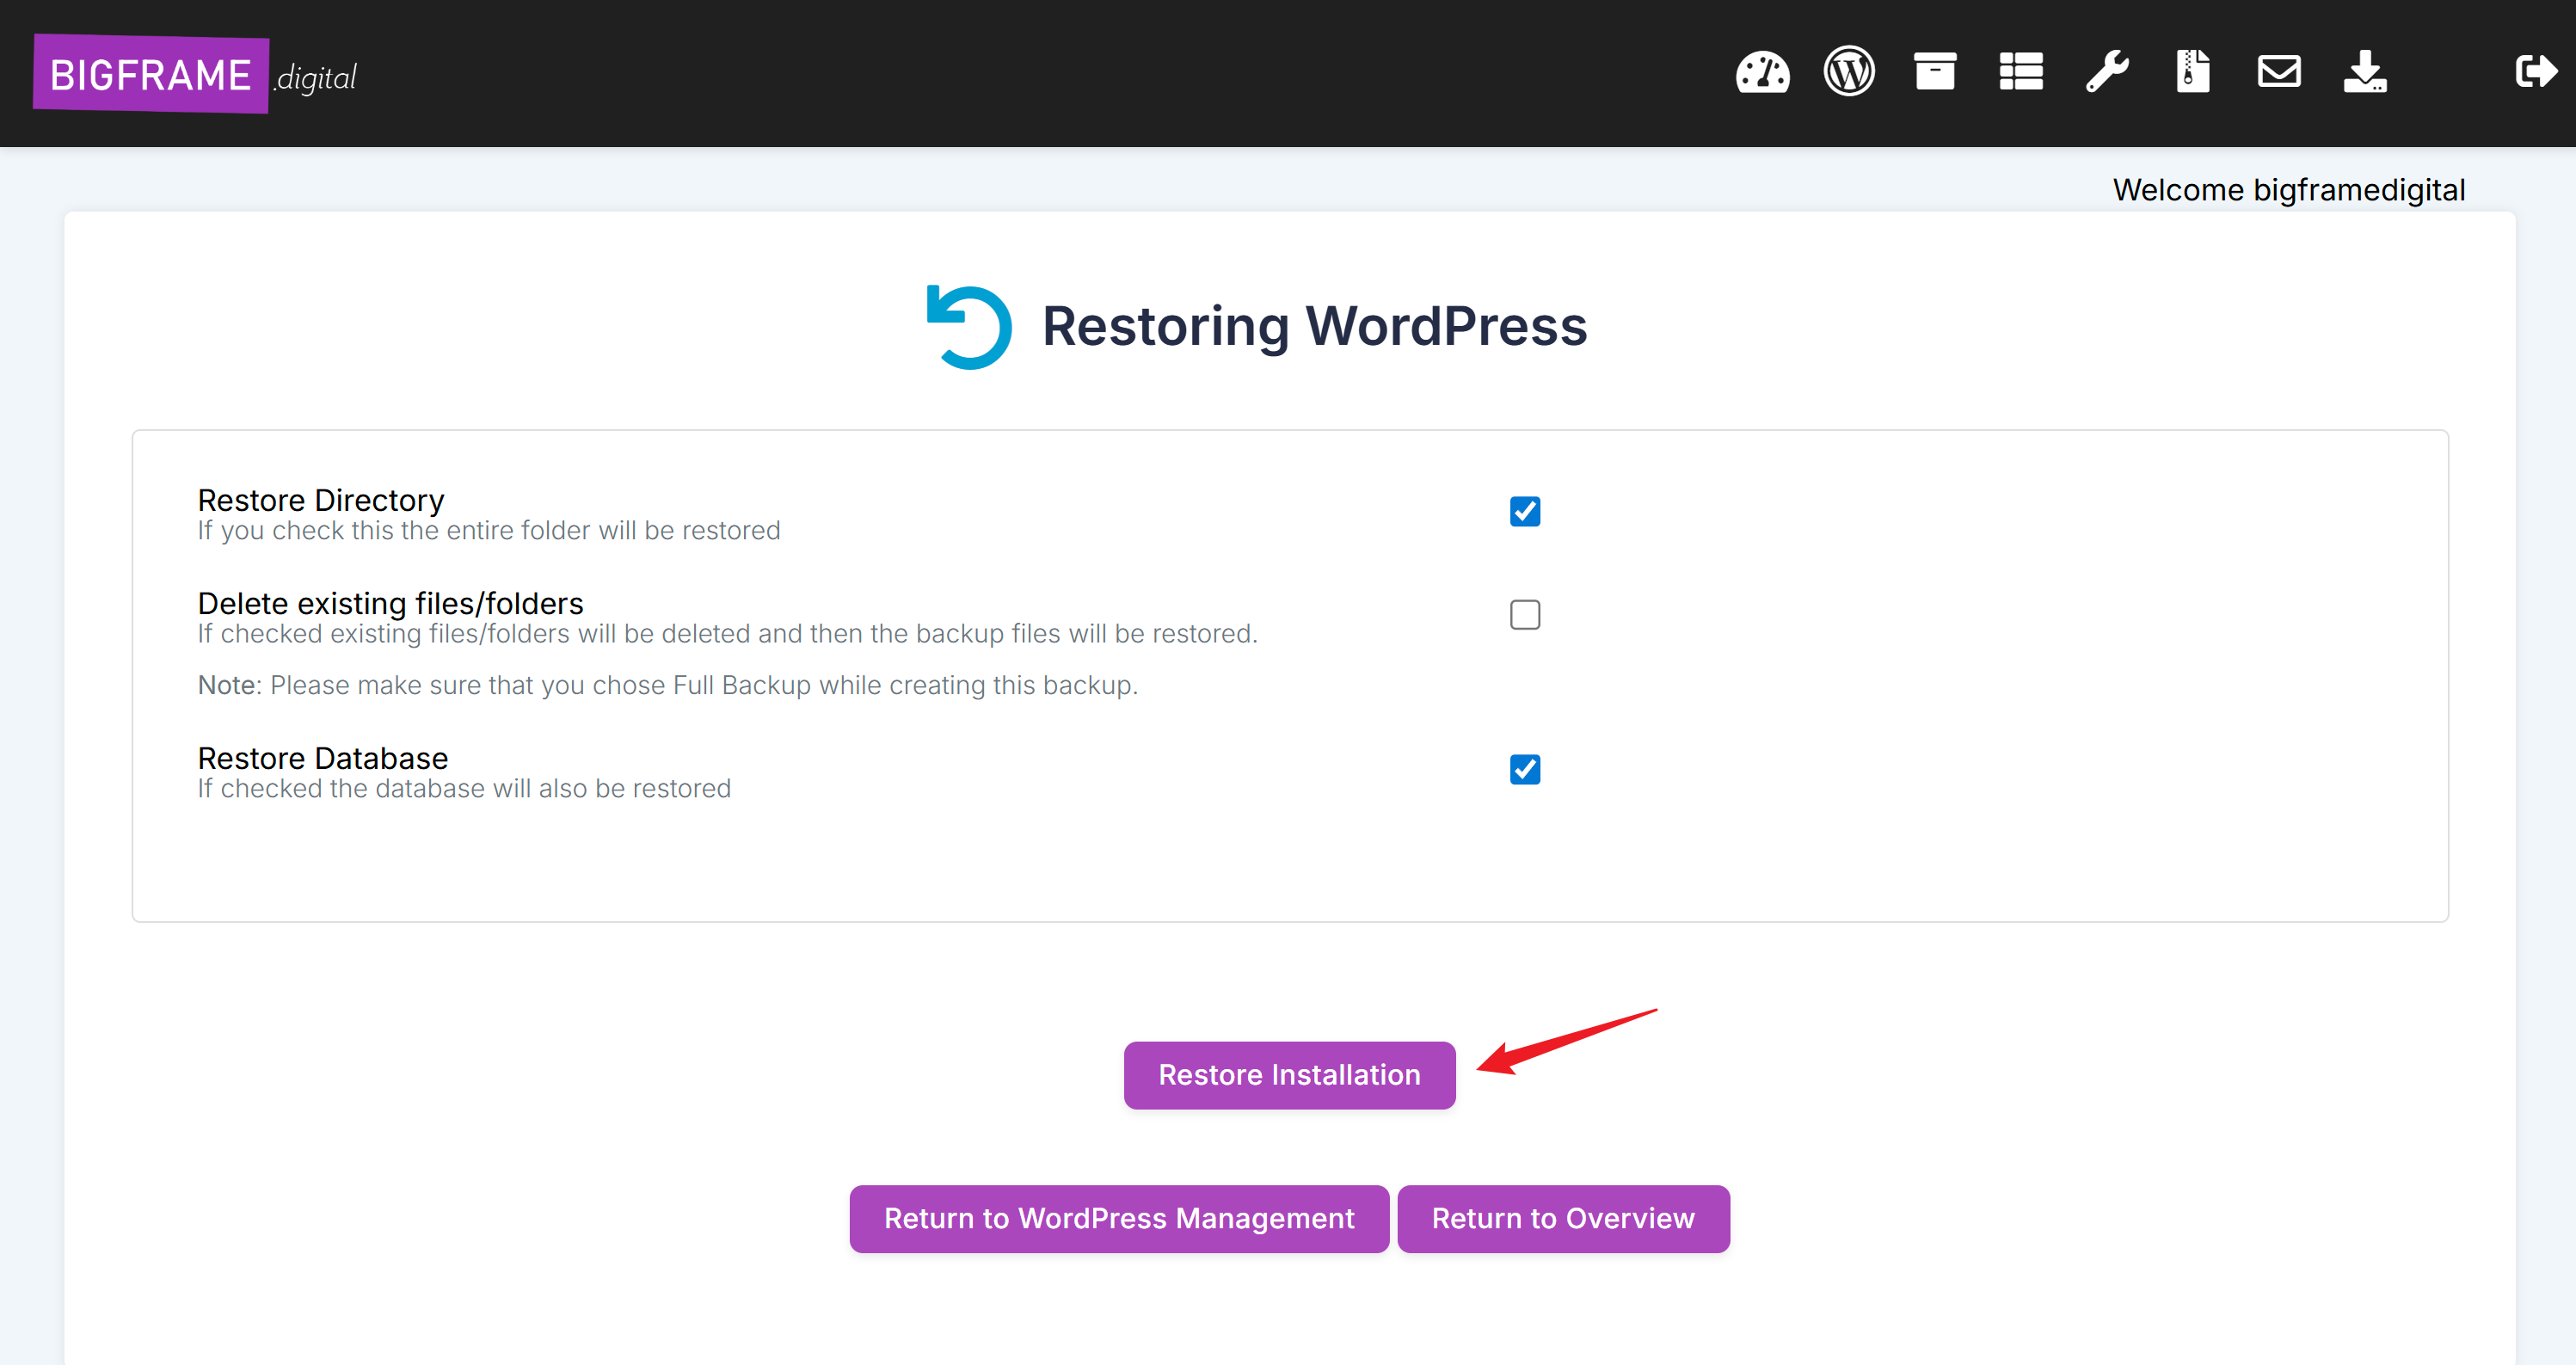
Usually, nothing needs to be modified from the default, you can simply press Restore Installation, wait and be done with it, but there are certain circumstances where you will want to mark the checkbox on Delete existing files/folders to restore a backup, example, when you installed a new plugin that was crashing the site, in this case it is necessary to delete files first to make sure the new files added won't be there when the restore is complete.
That concludes the tutorial. Now you now how to manually create a backup and restore a site in case of issues. You can explore our other tutorial on how to schedule automatic backups per site that you can find in our Knowledge base under Hosting - WordPress Manager.


