In this guide you will learn how to add a domain into your Cloudflare account and then add it into your hosting account while having proper certificates loaded into both your hosting and Cloudflare.
Step 1: Locate Your Hosting IP
The first step will be to locate your IP. For this you will need to login to your control panel first. You can either follow our guide on how to locate your control panel here or open a support ticket / contact us via Slack to request your direct URL for your control panel, which will allow you to login directly into the interface.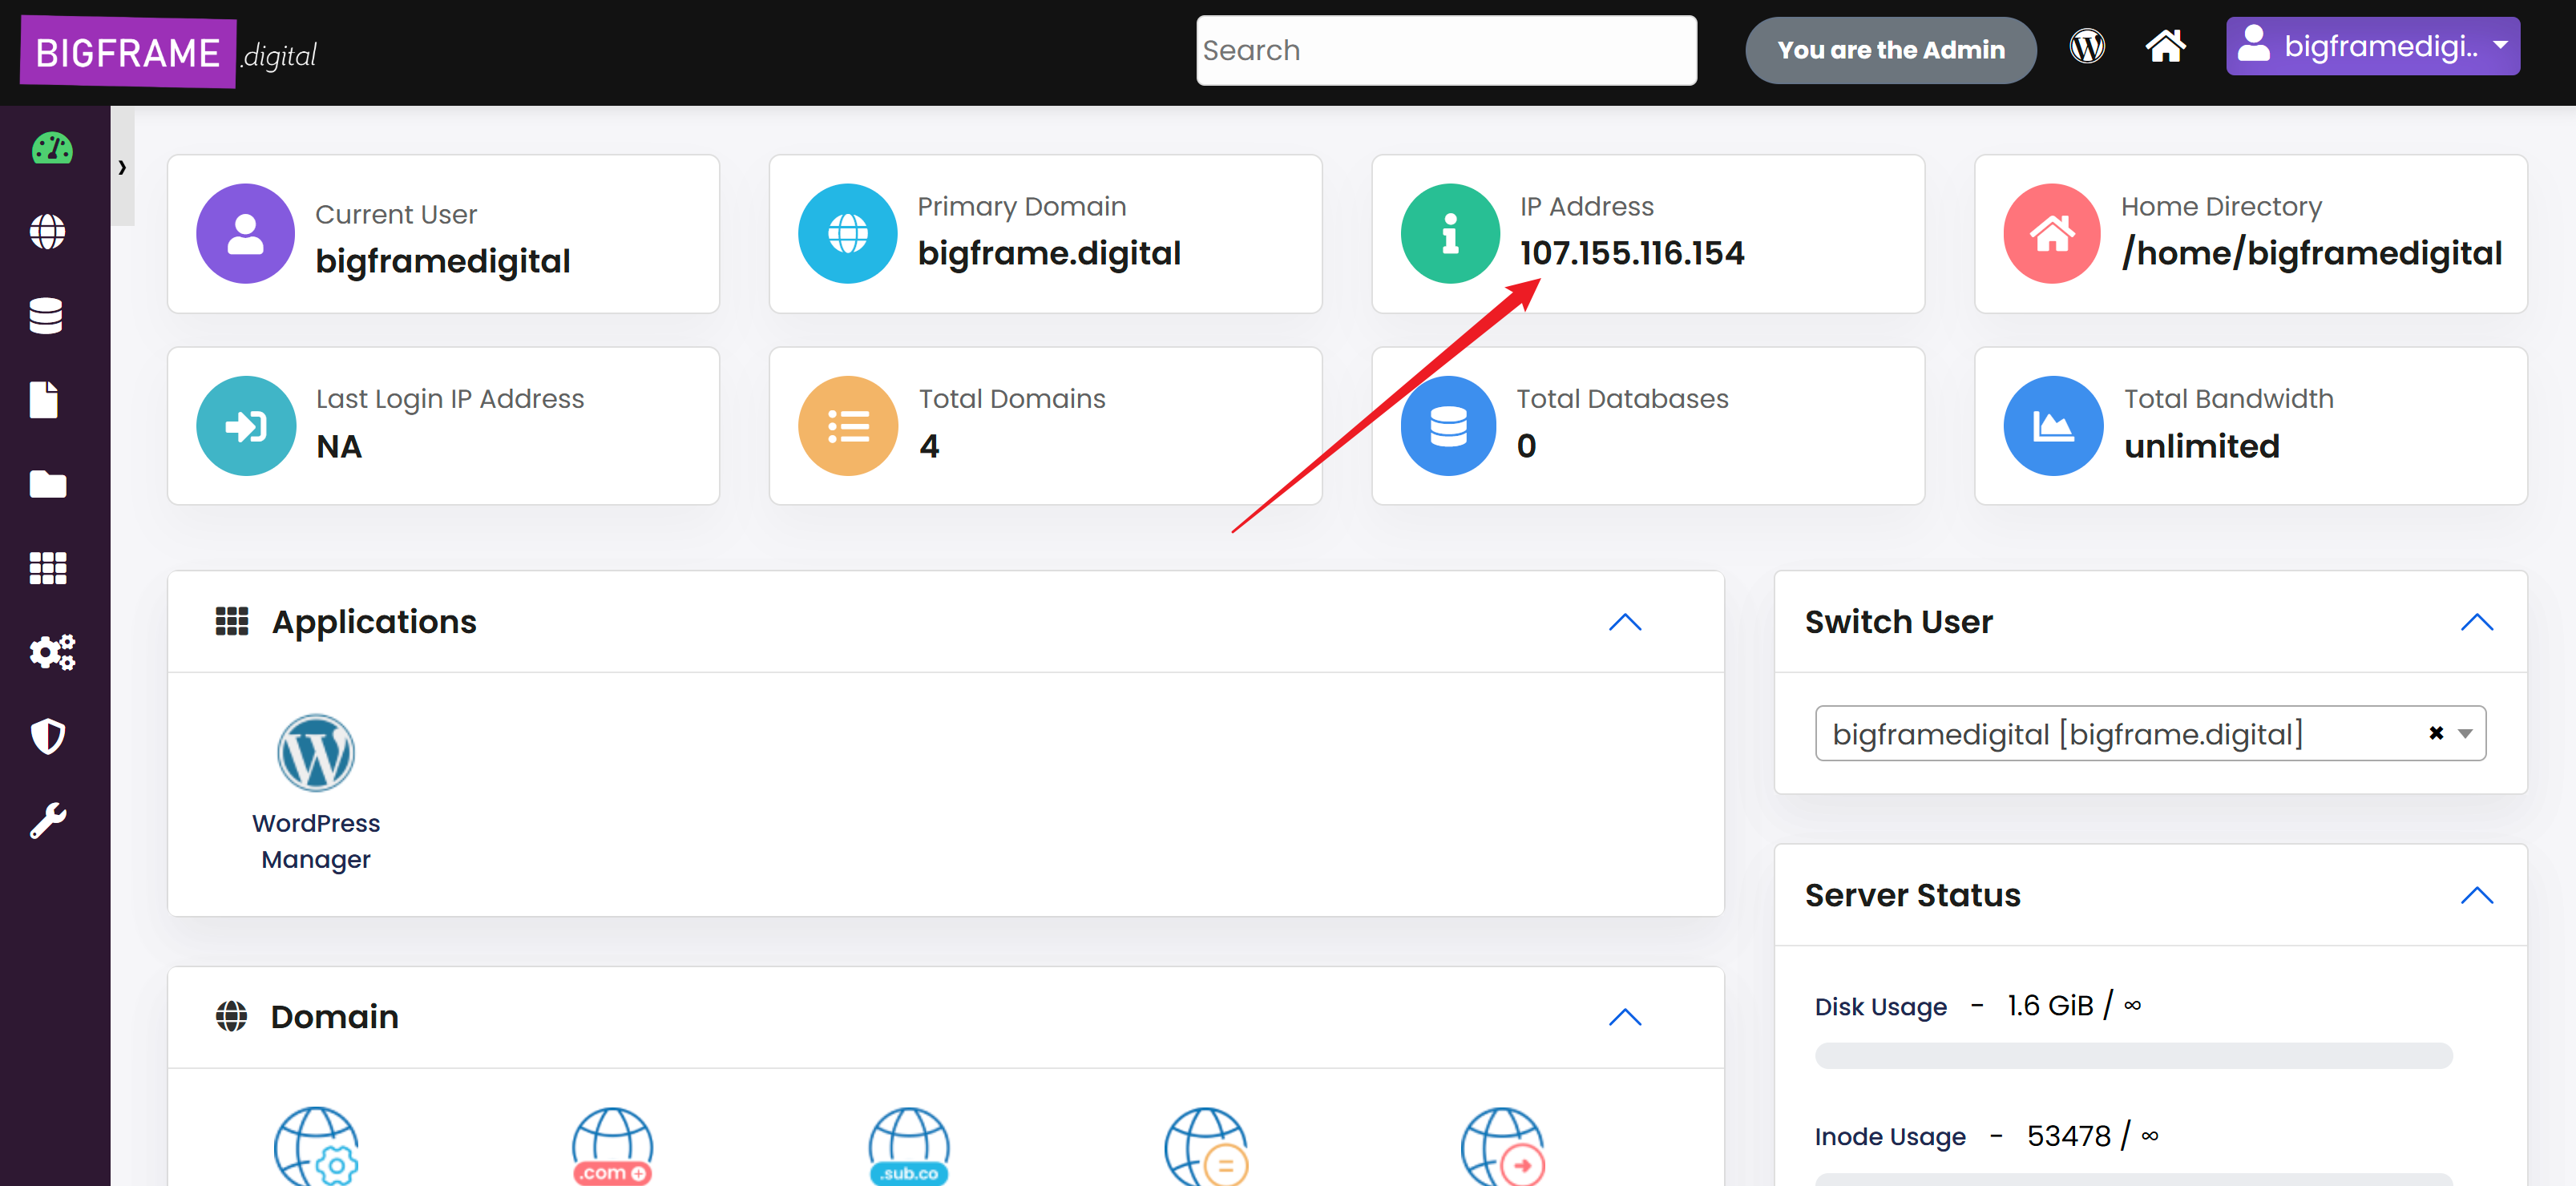
Upon opening your control panel dashboard you will have to locate the IP of your account. You can copy the IP that you will see assign in the location on the screenshot and use it to add the proper entries into your Cloudflare account.
Cloudflare
For this, go into your Cloudflare account -> DNS and add entries similar to this: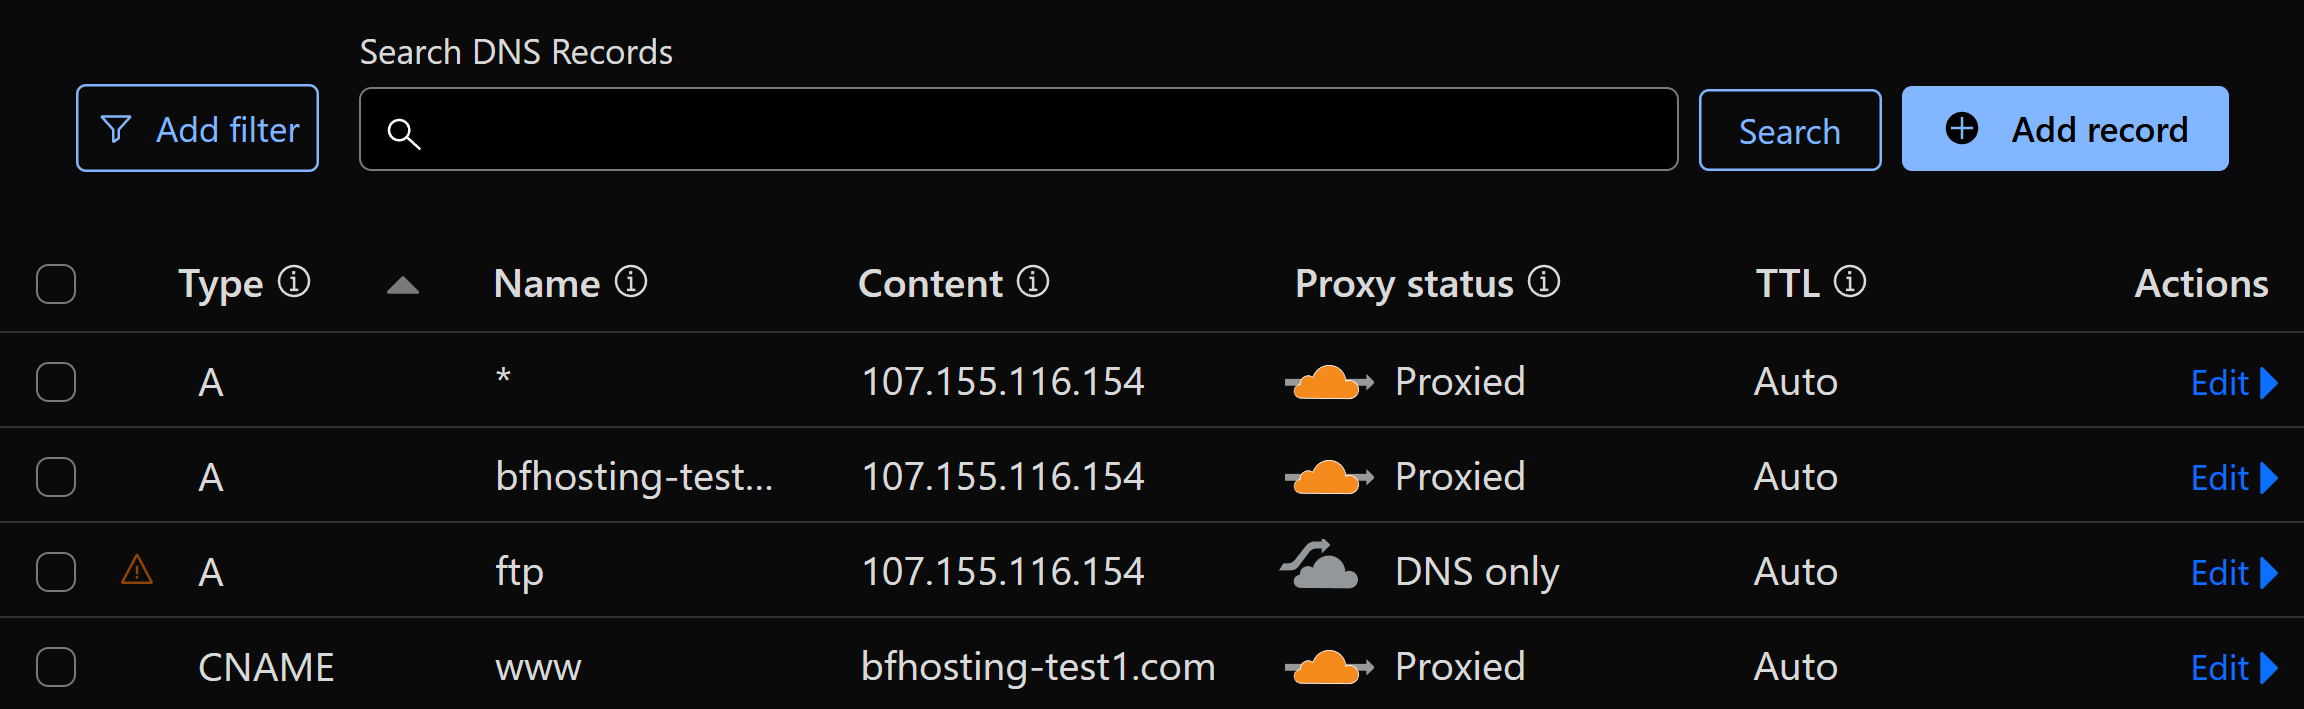
You will need to use the IP that is provided in your account, do not use the one in our example. You should add 3 basic DNS entries always.
DNS Entries to add
type A record with name * and the IP of your account in content and proxy enabled
type A record with name @ and the IP of your account in content and proxy enabled
type CNAME record with name www and the name of your domain in content
Alternatively if you want to also use FTP, you need to add the following entry
A record with name ftp and the IP of your account in content with proxy disabled
The last bit is very important to be able to use FTP, proxy must be disabled for this entry as Cloudflare will not allow to pass traffic through the FTP port when enabled, by setting a specific DNS entry for the FTP without proxy, you are making sure that whenever you need to access your FTP account, it will connect directly to your server location, not Cloudflare.
The resulting FTP server access will be ftp.yourdomain.com
Once the DNS entries are added, you can now proceed to add the domain from your hosting control panel
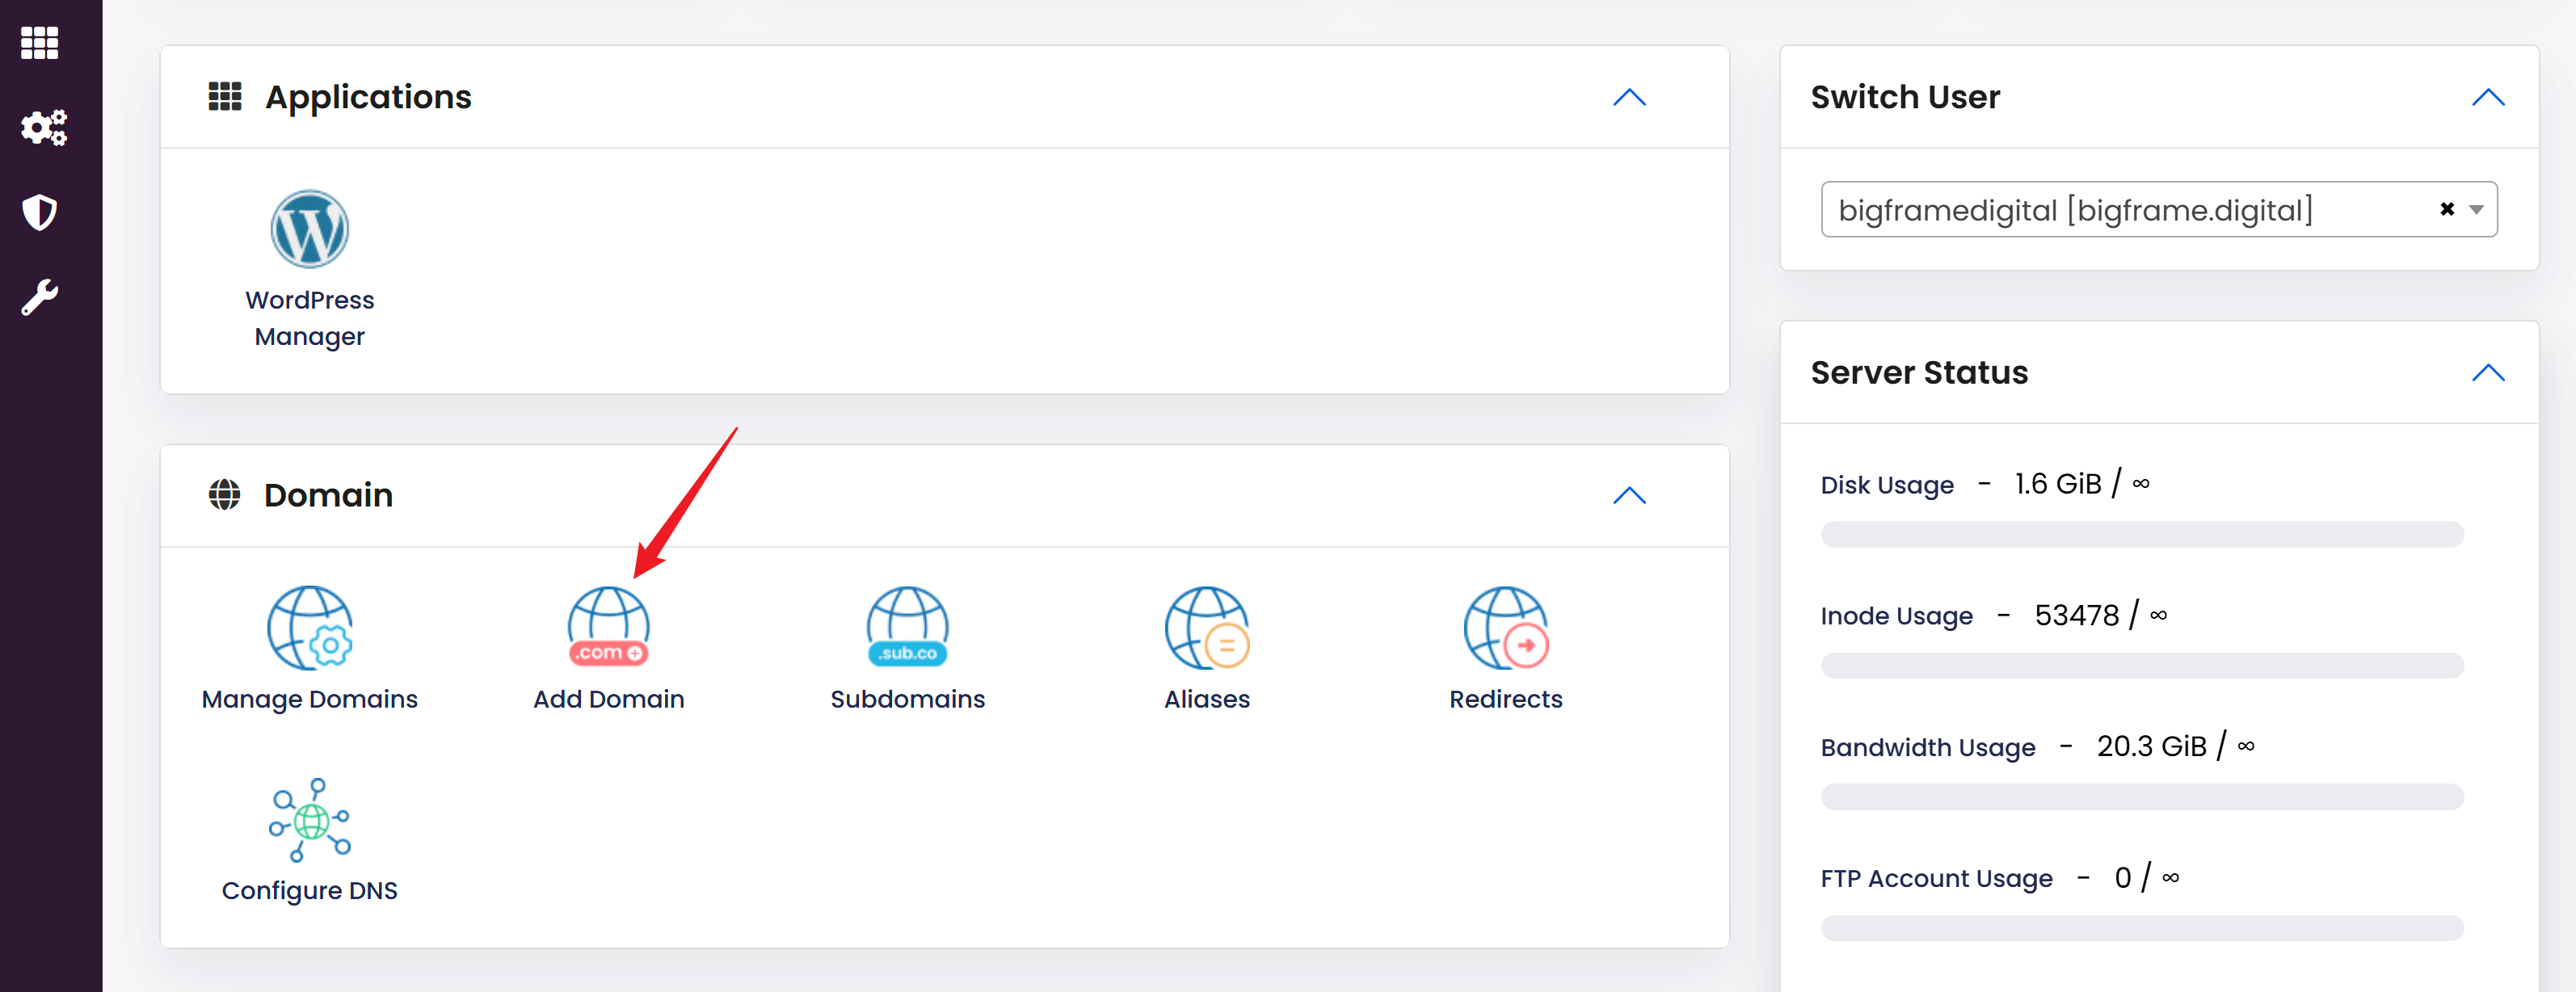
Add Domain in Control Panel
Proceed to add the domain by finding the domain block menu
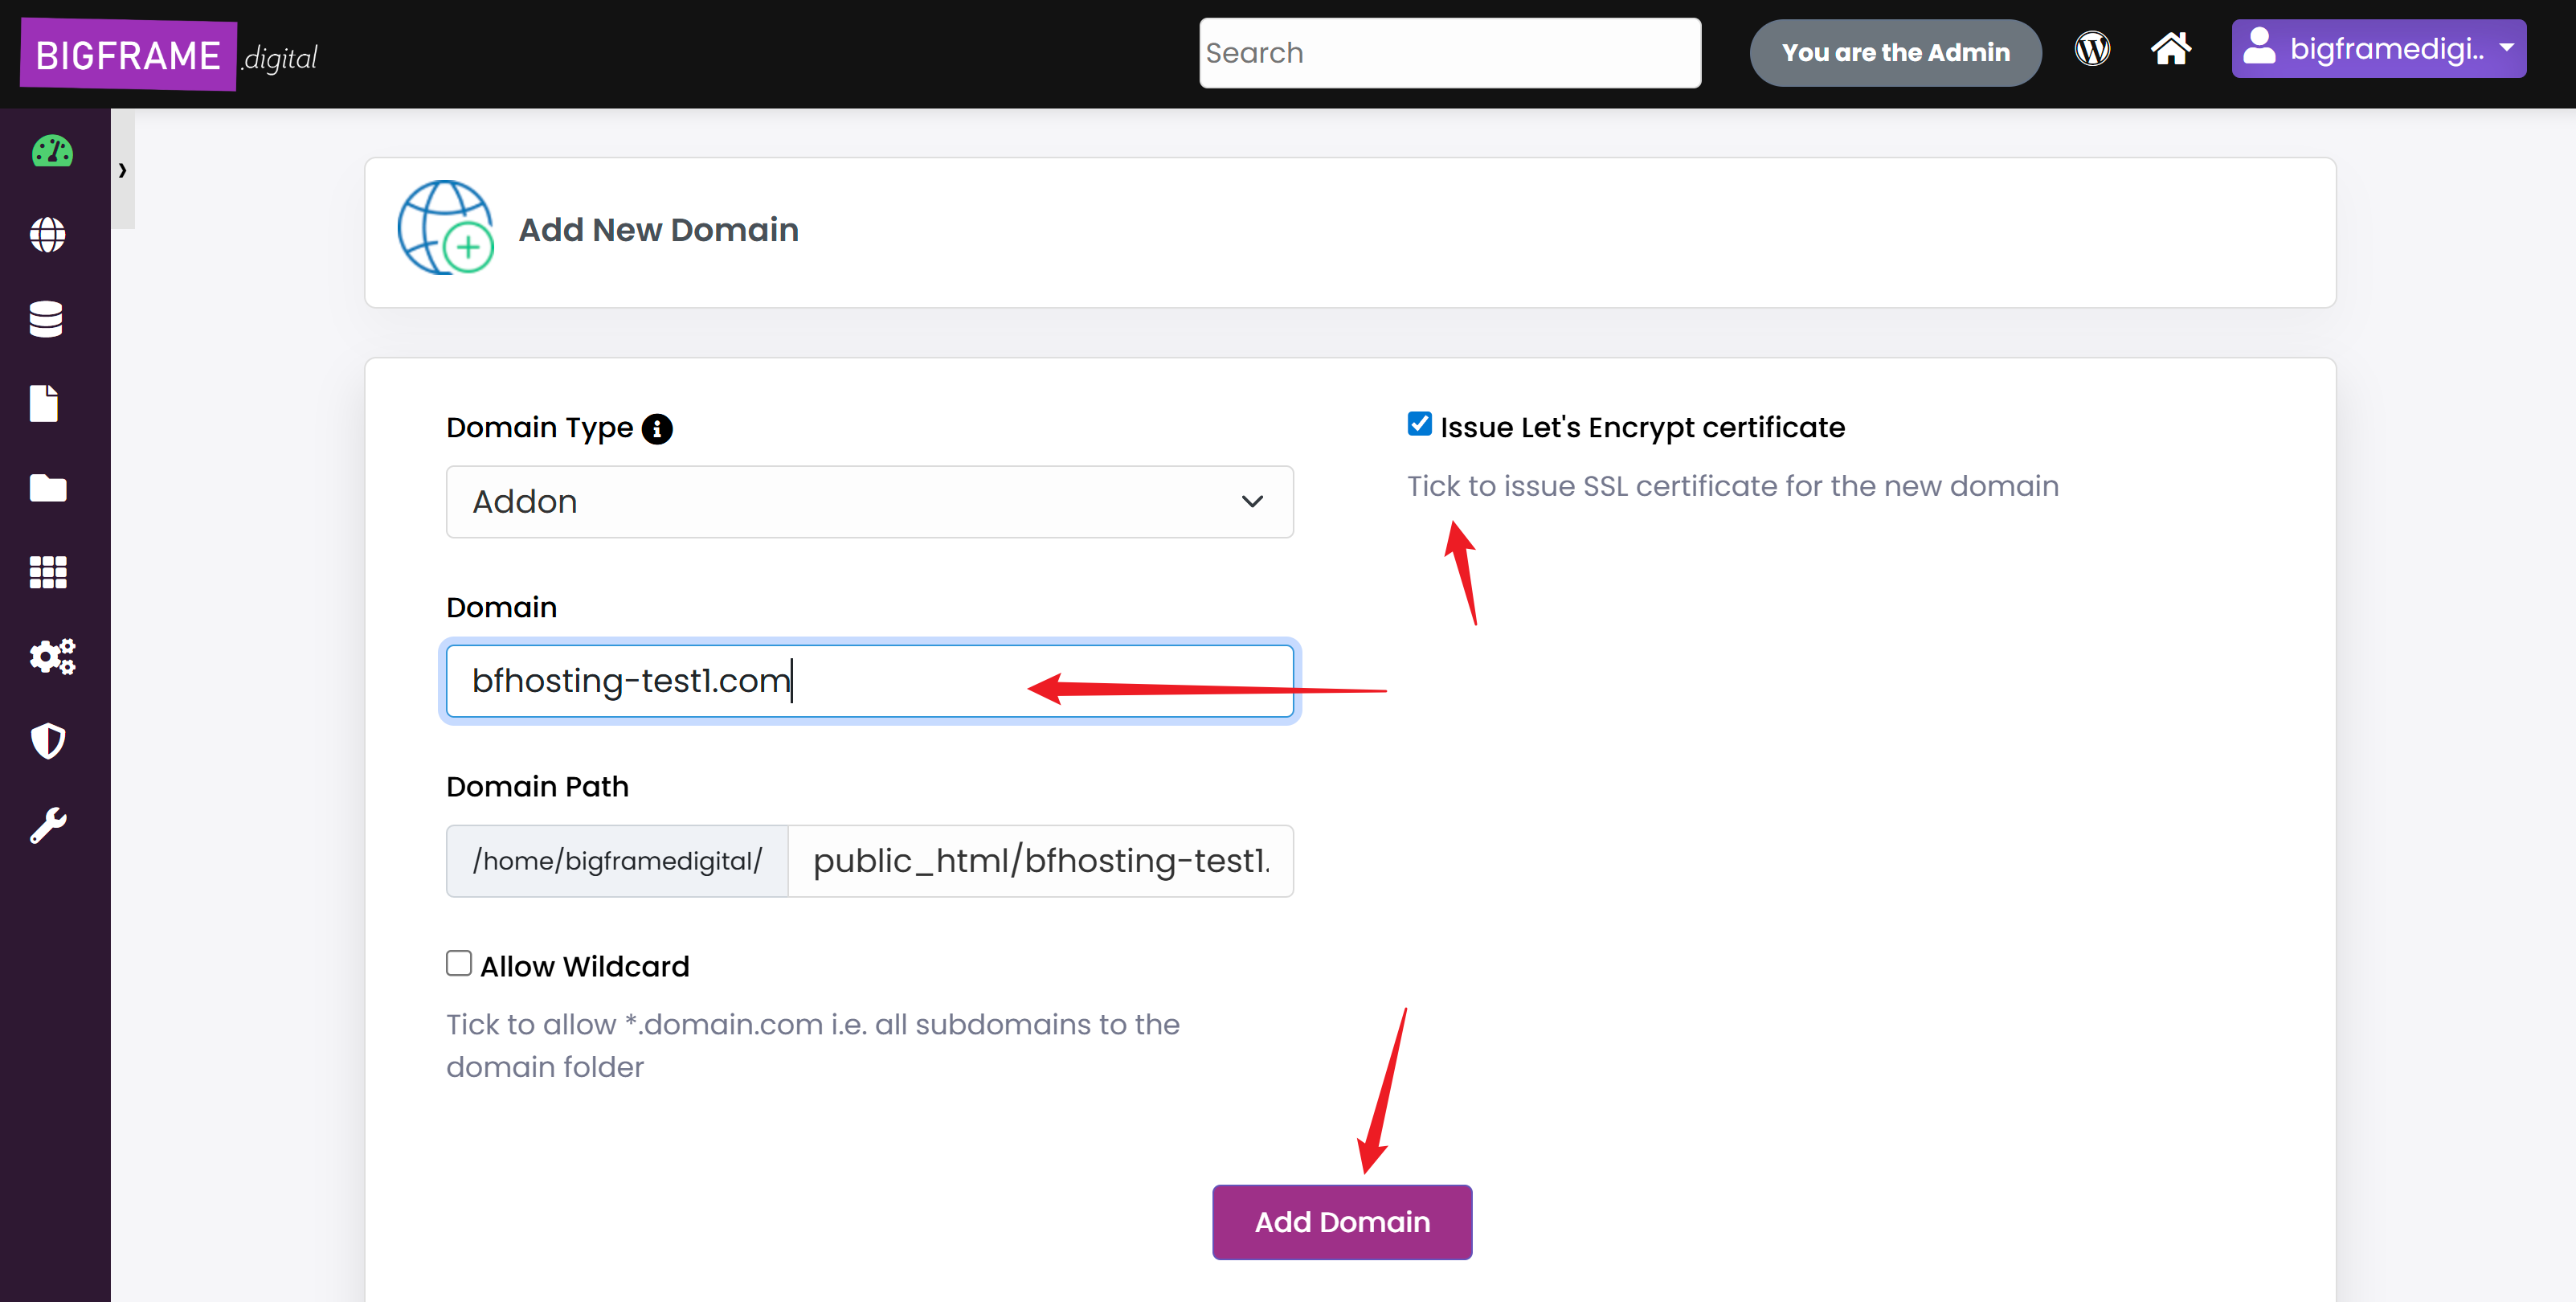
Now add the domain manually. You will see that the Let's Encrypt checkbox is already enabled. This is why we instructed you to add the domain to Cloudflare first, otherwise, when the system tries to install the certificate automatically (which will do as soon as you create the domain) it will fail if it's not pointed correctly.
All done!. Your domain is now active in your hosting account. Now if you want to create a new website or clone an existing website or template under your account, you can check our Knowledge base in the WordPress Manager section
Extra Step (in case the domain wasn't added to Cloudflare first)
In case you've omitted to add the domain the IP to your registrar or point the domain in Cloudflare first, the Automatic certificate issue will fail on our end as the IP wasn't detected properly at the time of creation. There is nothing to worry as this can be done manually at any time.
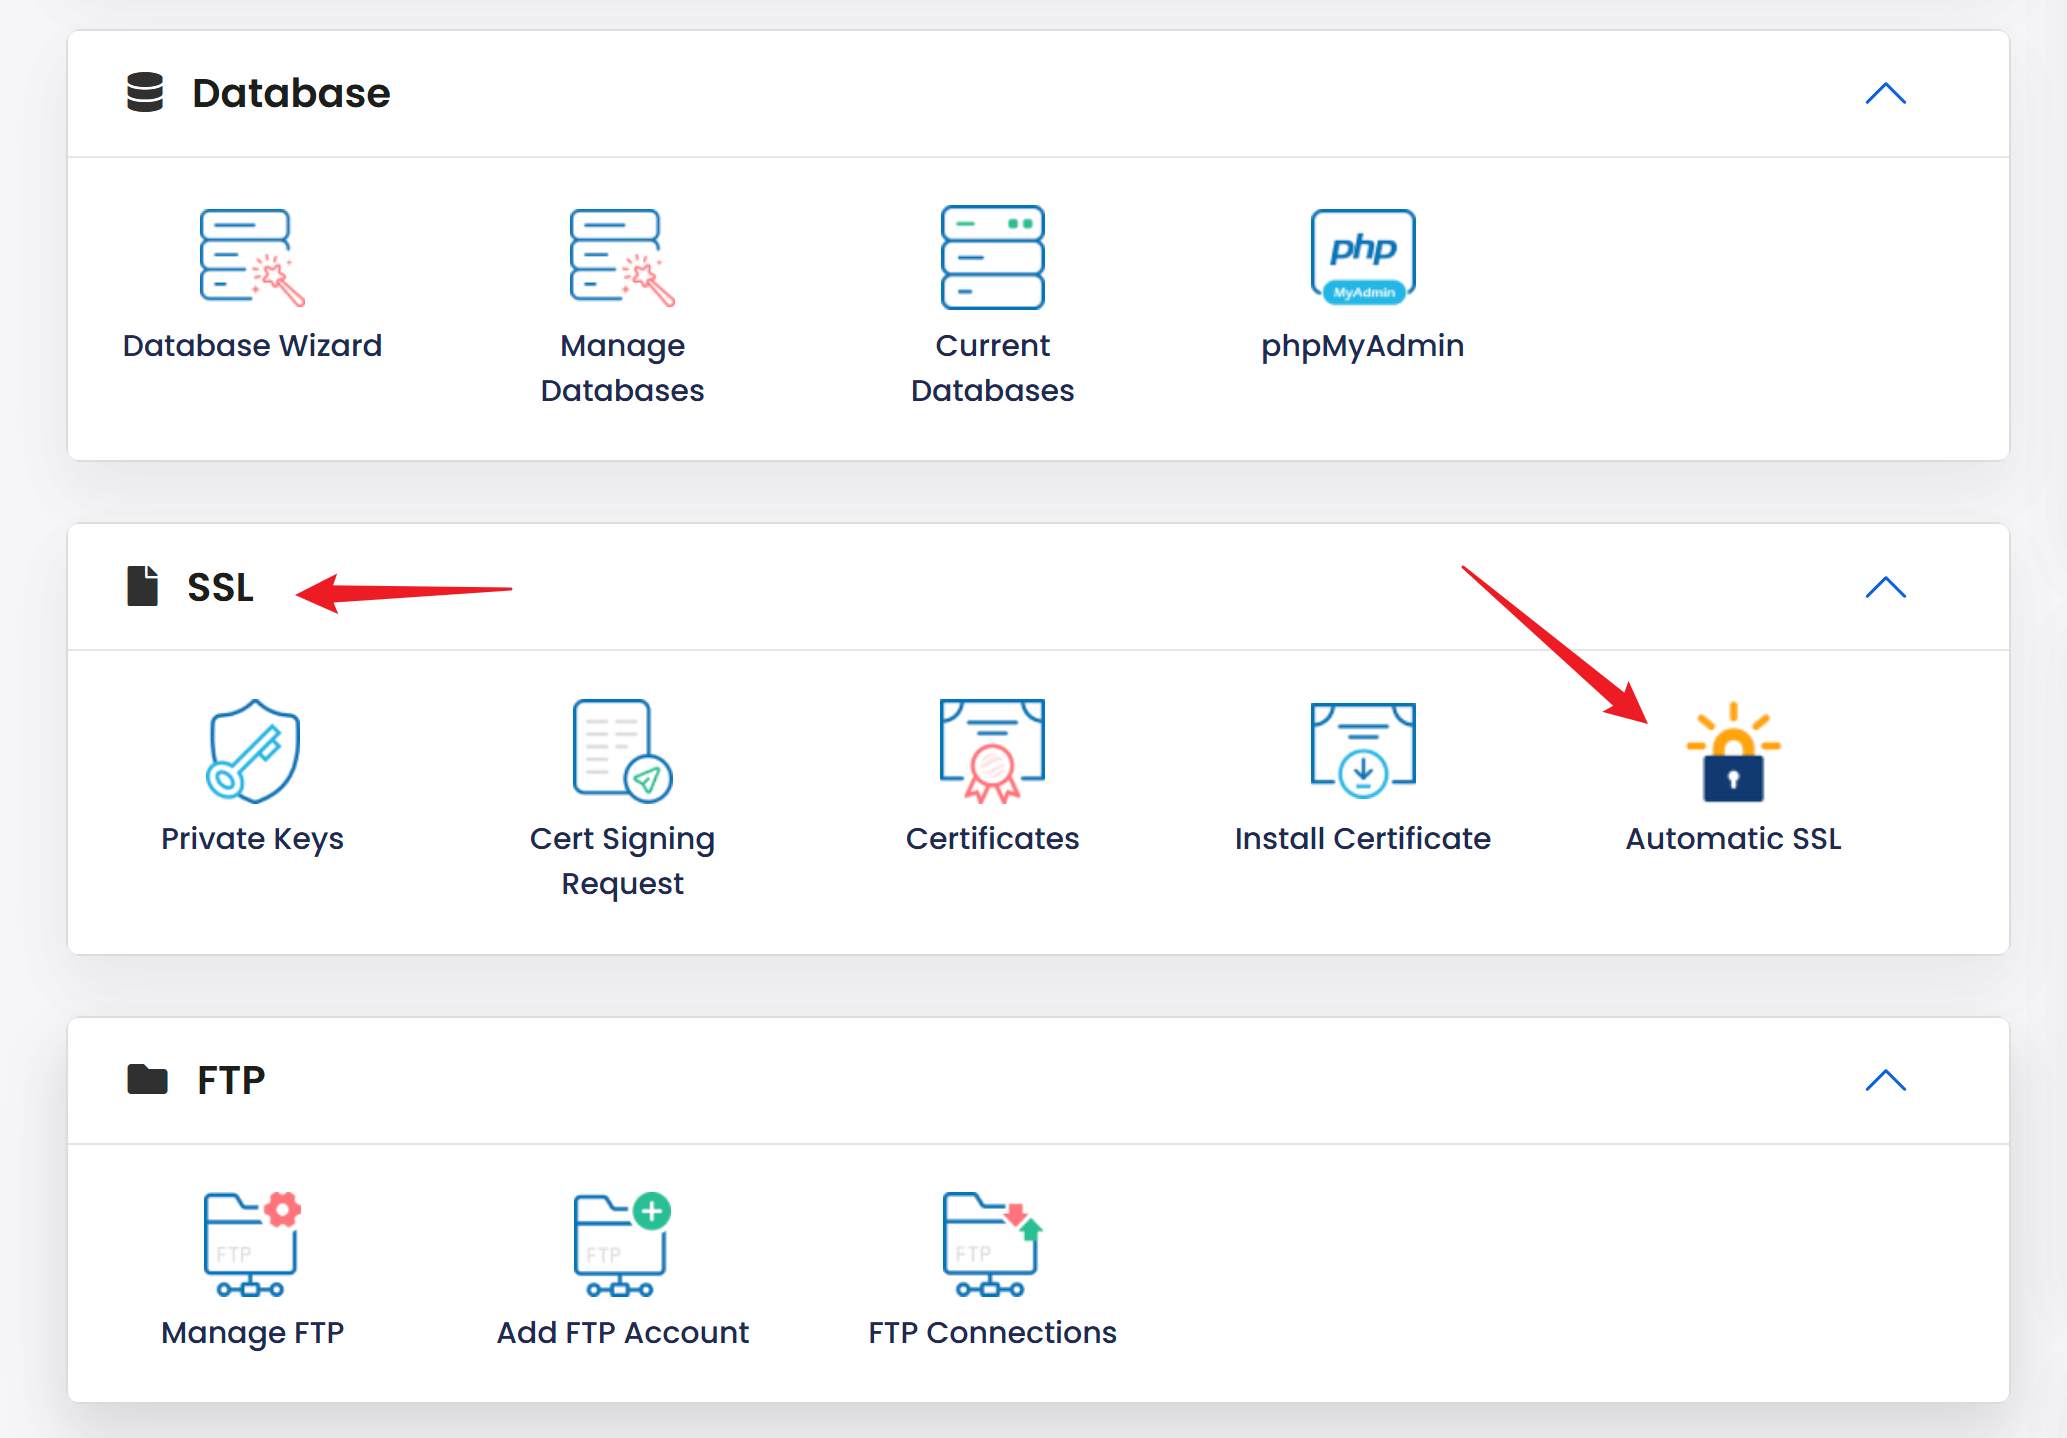
Simply go into the SSL section and click on Automatic SSL
This will open a window that will allow you to see all the certificates for the domains in your account. It's important to remember that the domain list will be constructed by creation date so your last domain created will always be at the bottom
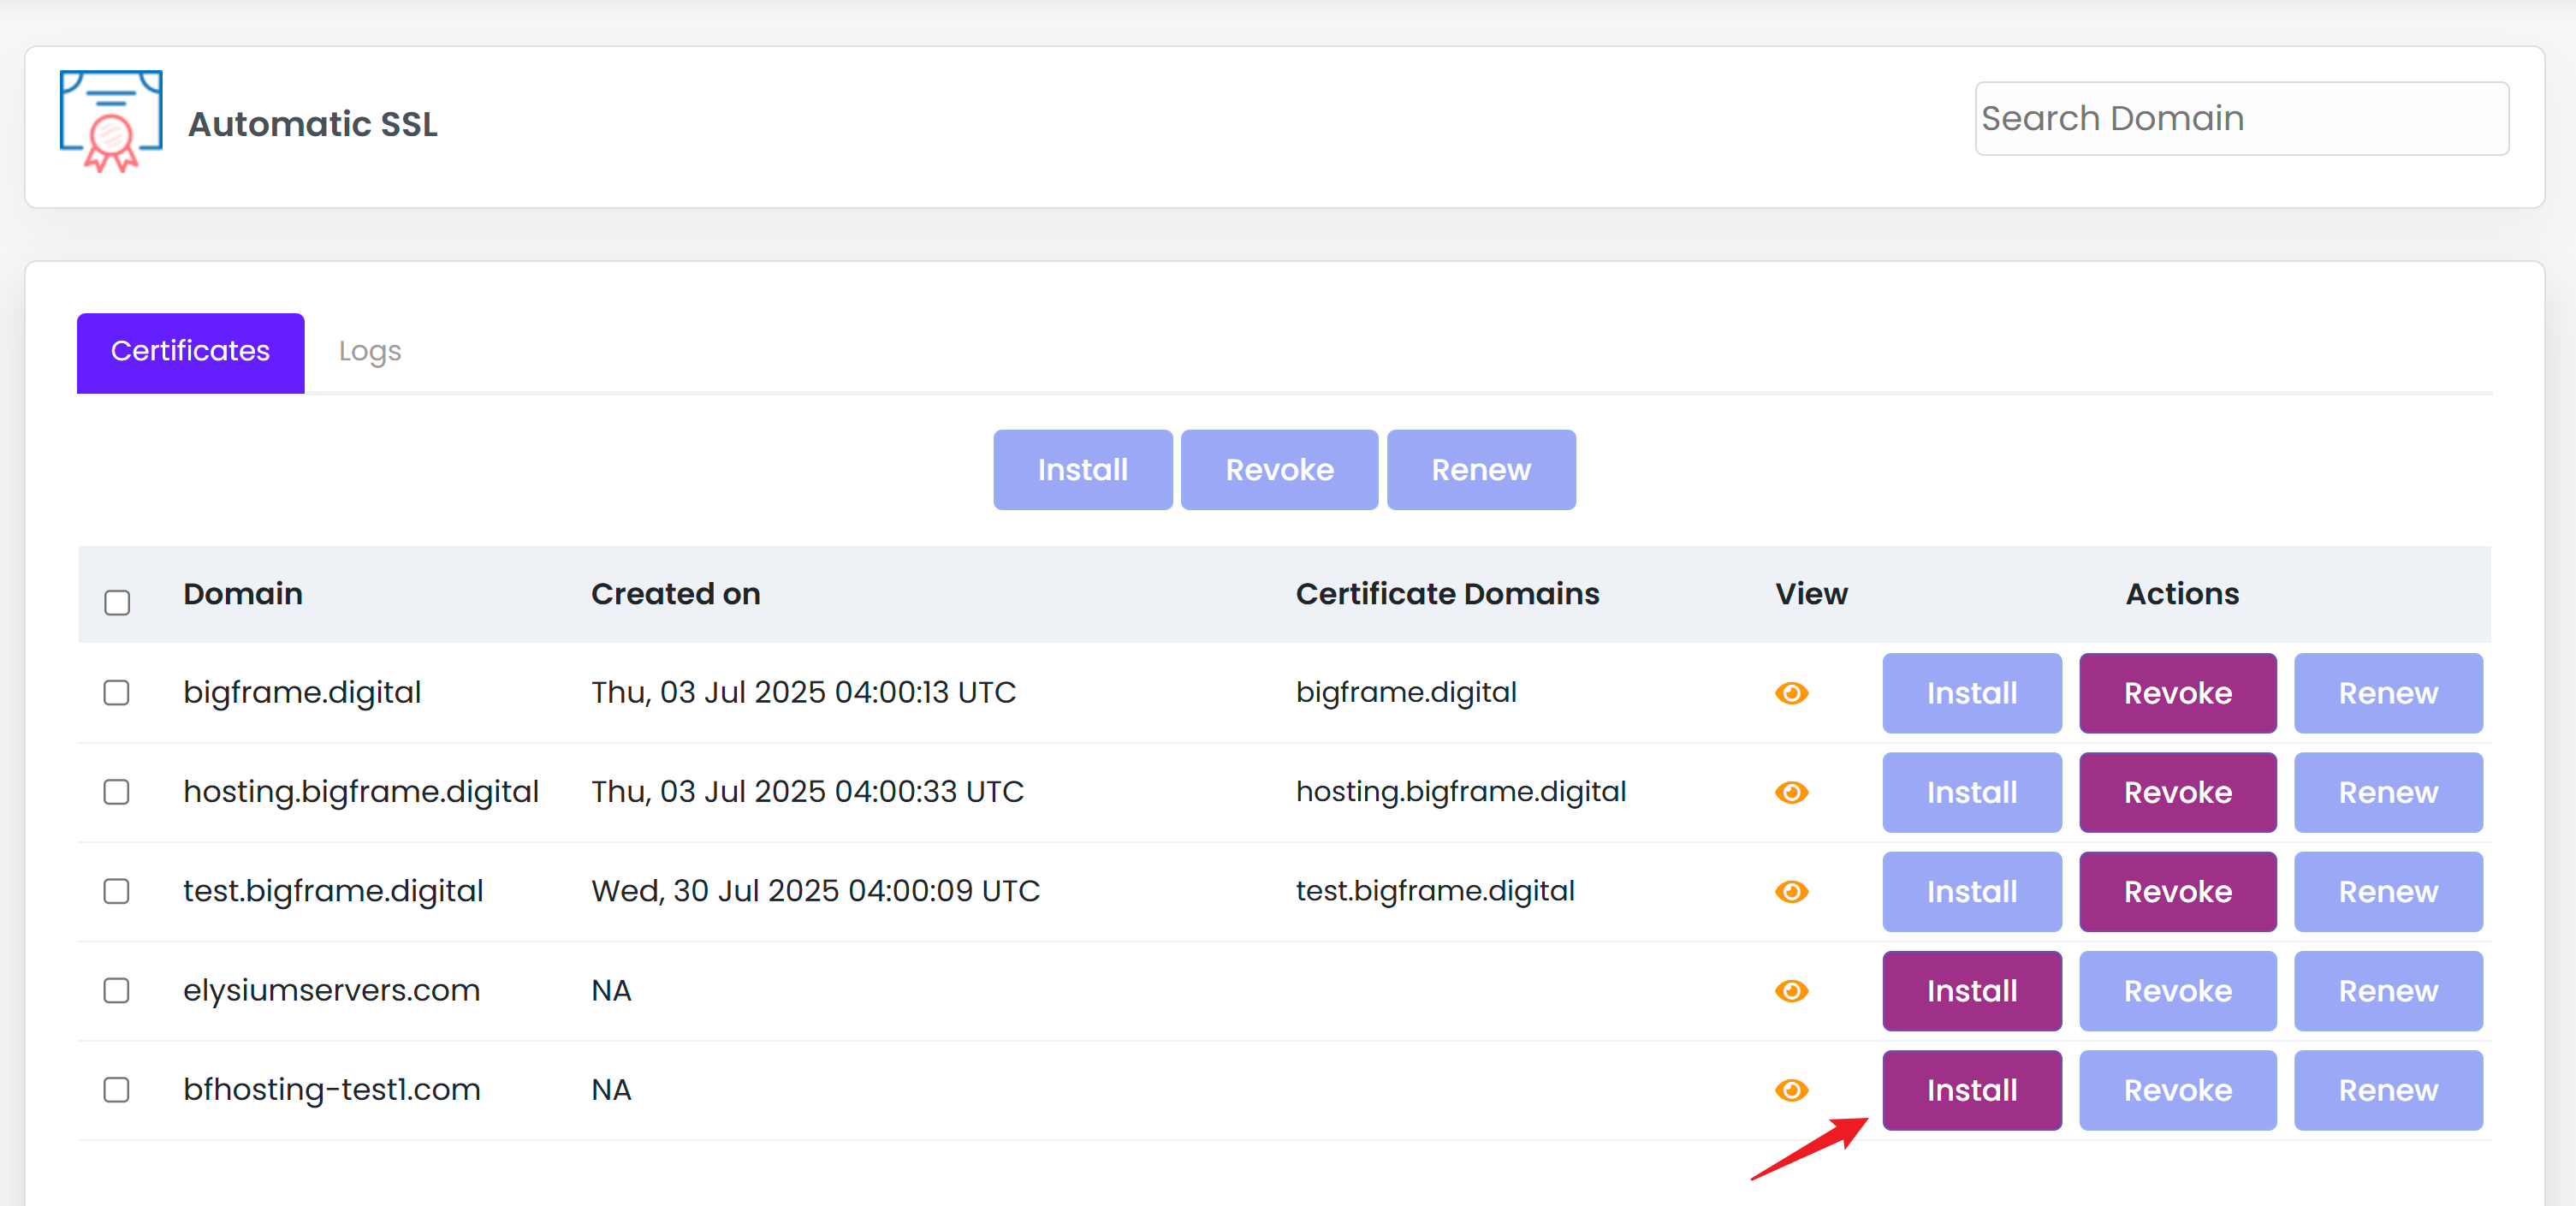
Once you've located the domain, simply click Install
You can monitor the certificate being issued in realtime by clicking on the "Logs" tab on the top.
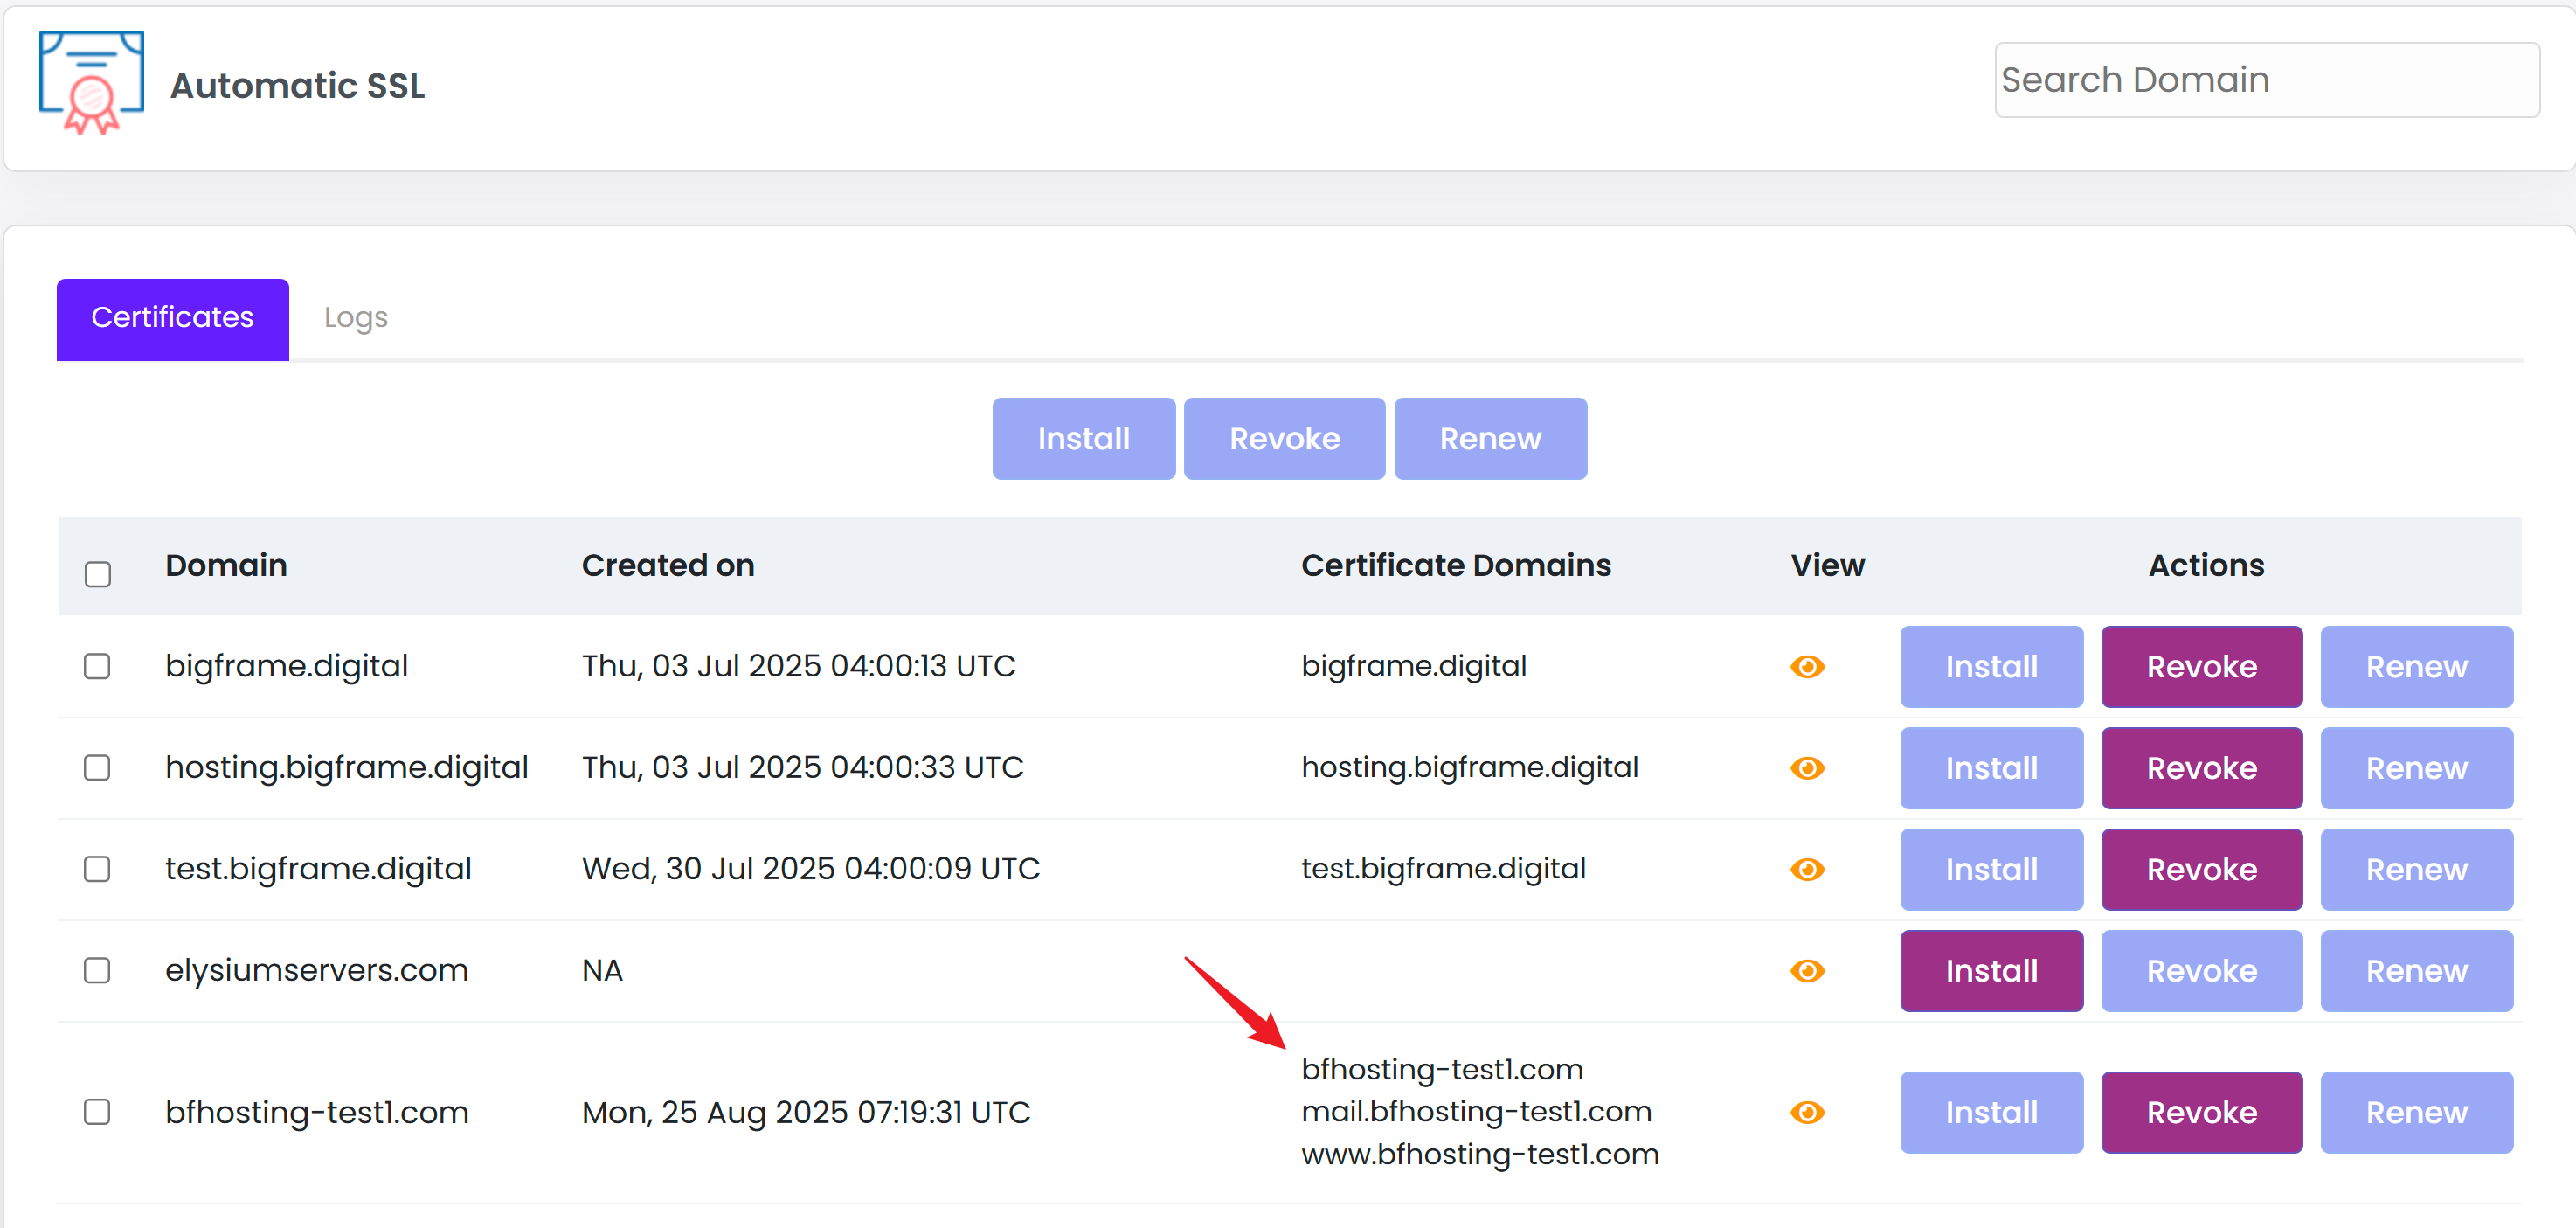
You can confirm that the domain was created simply by refreshing the window. If the domain certificates are loaded, you should see at least the main domain and the www part in the certificate. The system will naturally add mail even though this is not used in our service.
That concludes the tutorial, please refer to our WordPress Manager section to start managing your websites.


